
If you only have 9 Service Providers, you do not really need a custom search engine or filters or prefilters. But if you will eventually have more than one hundred Service Providers grouped into 6 continents and 4 or more categories– then a custom search engine becomes essential. Your Members can then search for a particular service category located on a particular continent. It is this combination of list by location combined with the ability to search by subject or category that makes Fabrik so useful for building a community of people in the same location and interested in the same subject. Your members can then view the Details for these service providers and choose two or three as final candidates to contact directly for more information.
Add a Fabrik Search Engine to your List
To add a Fabrik Search Engine to the top of your list, go to the Provider Info List Details Screen and click on the Filters Tab:
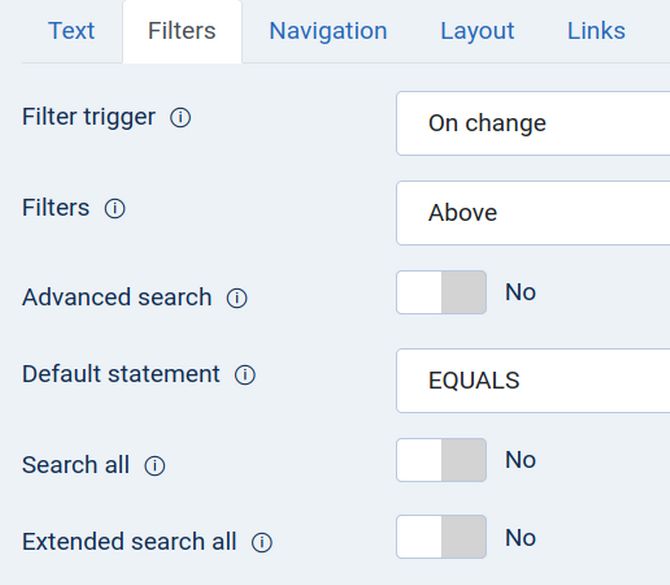
Filters are fields that are used by the search engine to help your members find what they are looking for by filtering the list's data based on the data values. The filter trigger determines when the filter is applied. Leave it set for on change. Leave the location at Above. Change Advanced Search from No to Yes. Click Save.
Benefits of the Fabrik Advanced Search Option
Fabrik offers at least four kinds of search engines. The two shown on the List Details Filters Tab are called Advanced Search and Search All. The Search All engine works well in the Joomla administrator Control Panel View Data screen. But Search All does not work on our front end List page. This is likely because Search All has a conflict with some setting on our Helix template.
Thankfully, the Fabrik Advanced Search option displays well and works well on the front end of our website. Advanced Search also has a setting in each element in the List View Settings screen Filters tab to precisely define what elements appear in the Advanced Search options. So we will use the Advanced Search option on the front of our website and Search All on the back end of our website.
There are also several other types of search options mentioned in Fabrik Tutorials and on the Fabrik forum. These include using a Fabrik Search plugin to access the Joomla standard search function or the Joomla Smart Search function. Neither of these worked with my template. This may change in the future. Finally, there is also an option called Related Data. We will look at this option later. But for now, we will just stick with the Fabrik Advanced Search option. To turn on Advanced Search, change the setting to Yes. Then click Save and Close. Then view the Advanced Search tool as a logged in Member.
Click on Advanced Search to open the tool:
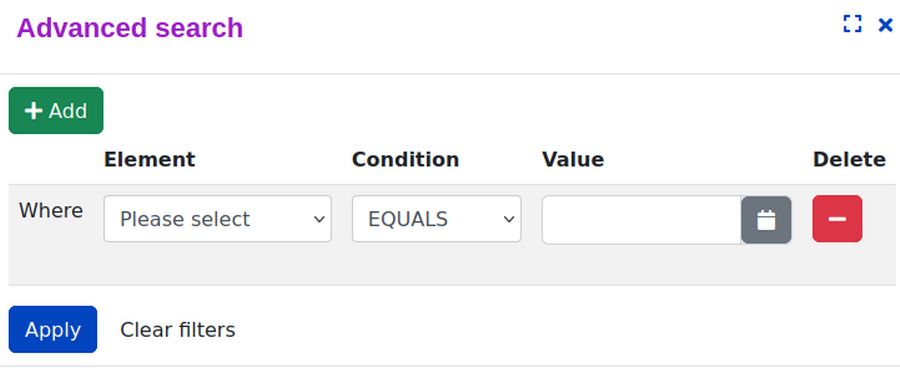
Click on Where Please Select to see a mountain of confusing options:
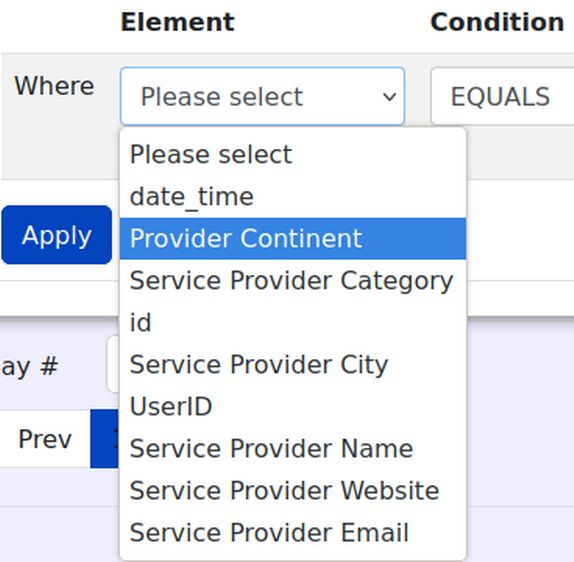
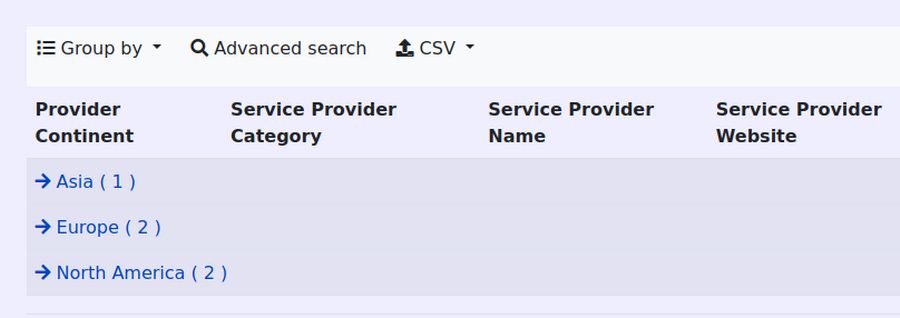
The only options we want members so search by are Provider Continent and Service Provider Category. Click Category. Then for Value, click Website Designers.
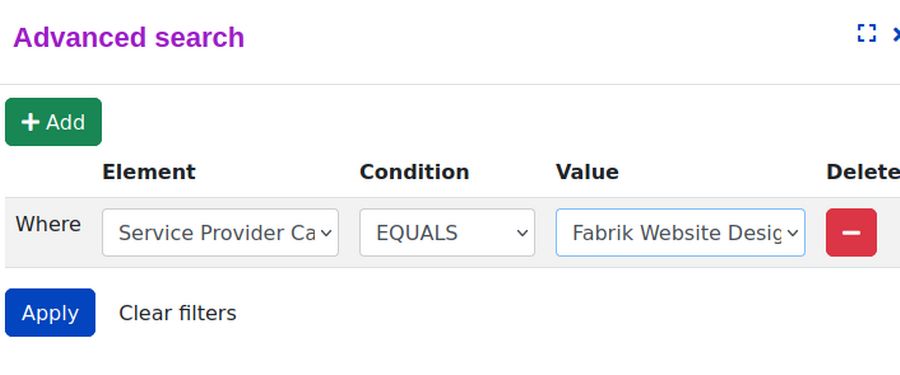
Then click Apply.
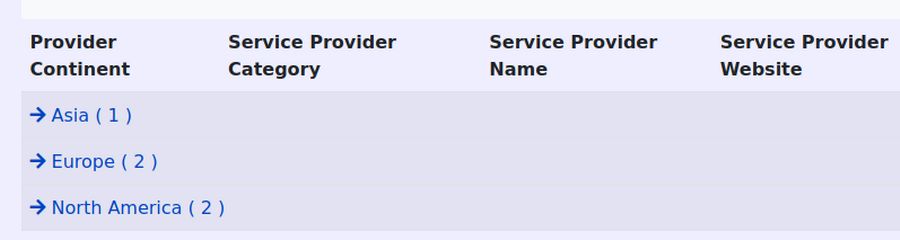
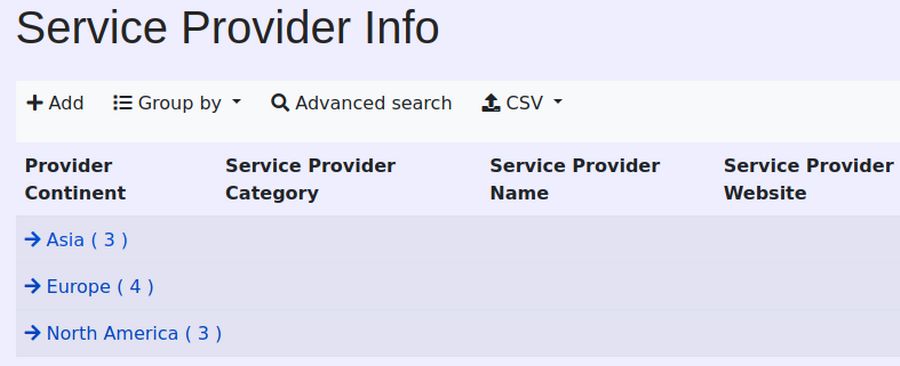
Our Member can now see that the list has one designer in Asia and two in Europe and North America. What we have learned from this exercise is that we should add instructions at the top of the list to explain to members how to use the Advanced Search tool. The second lesson is that we need to limit the number of elements shown in the Advanced Search tool. We will do that next.
Limit the Elements Shown in the Advanced Search Tool
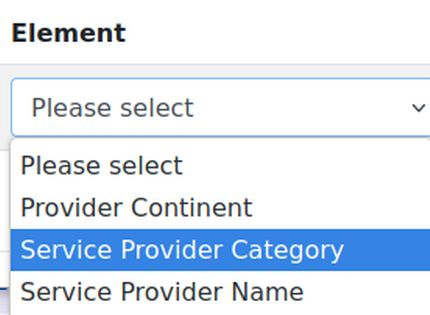
To limit which fields or elements are shown in Advanced Search, go to the Elements screen. Set the form filter for Provider Info. Then one by one, select each element and go to the List View Settings tab. Then click on the Filters tab. Then change Include in Advanced Search setting from Yes to No for every element except Provider Name, Provider Continent and Provider Category.
Then go to your website front end and click on your List page. Then click Advanced Search to see the result.
Now that we have simplified the Advanced Search filter, let’s create some instructions on how to use it.
Improve the Front End Service Provider List Page
We need to fix some problems with our Provider Info page. First, the title of the page is Service Provider Info which is the same as the title of our Service Provider Info Signup form page. But this is a List not a form. We need to leave the list name as provider_info. But we can change the Label of the list to Service Provider List. Click on the Provider Info list to edit it. Then change the label to Service Provider List. Then click Save. This will change the name of the list on the front end and back end. But it will not change the name of the database.
We also need to add some instructions on how to use the Advanced Search function. To do this, we begin by getting a screen shot of the Advanced Search tool in action:
Copy and paste the above image into a Libre Writer document. Then right click on the image and click on 150 DPI resolution.
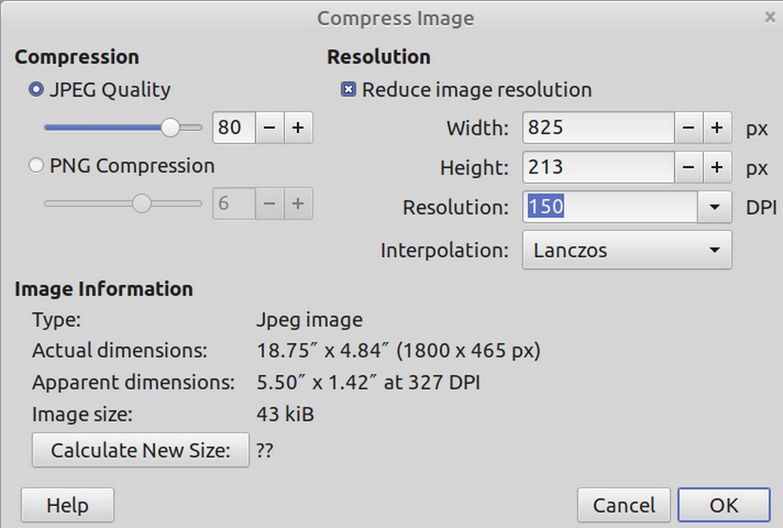
Then click OK. This will reduce the file size of the image to under 100 KB which means it is suitable to add to our website. Then right click on the image again and save it to your website images folder with the file name advanced-search-image. Then go to the back end of your website and open the Content, Media screen. Then click Upload, Browse. Then navigate to your File Manager website images folder.
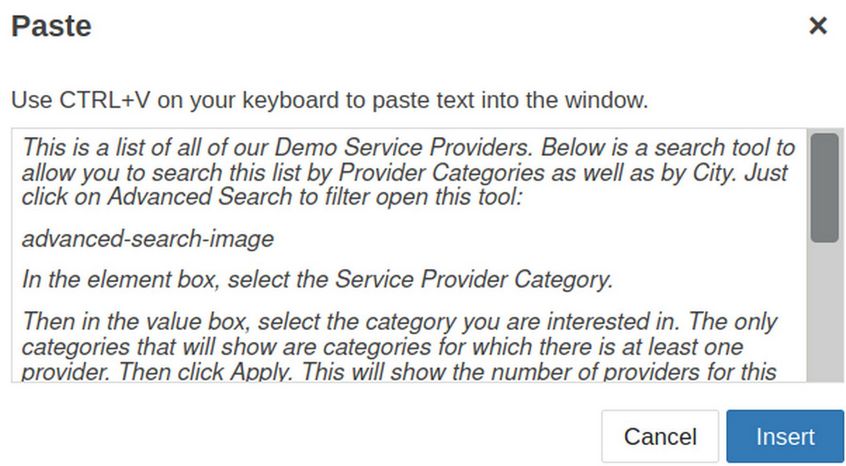
Select the advanced-search-image file and click OK. Then click Start Upload. Then click Components, Fabrik, Lists and click on Service Provider List open your list to the Details screen. Then in the Introduction box, copy paste the following:
This is a list of all of our Fabrik Friends Demo and Real Service Providers. Above this list is a search tool to allow you to search this list by Provider Categories as well as by City. Just click on Advanced Search to filter open this tool:
advanced-search-image
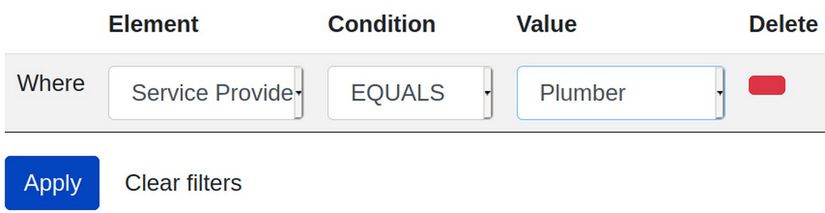
In the element box, select the Service Provider Category. Then in the value box, select the category you are interested in. The only categories that will show are categories for which there is at least one provider. Then click Apply. This will show the number of providers for this category in each continent.
Click on a Continent to see the names of providers in that continent. Then click on View for any provider to see the contact details and additional information for that provider!
Place your cursor in the Introduction workspace. Then right click and click Paste. This will bring up a popup. Select and Copy the above text. Then click Control plus V to paste the above text into the popup screen:
Then click Insert to insert the text into the workspace:
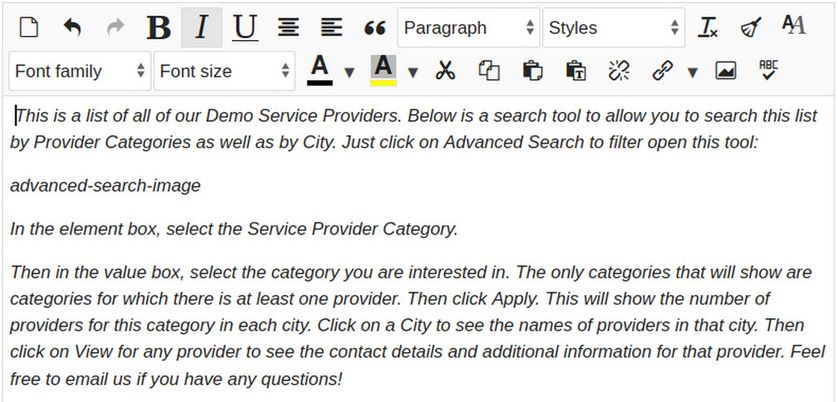
Then select all of the text and change the font family to Arial and the Font Size to 14. Then delete the line advanced-search-image. Then click on the Image Icon in the Editor second row on the right. Select the advanced-search-image. Then click Insert:

Then click Save and Close. Then view the Service Provider List page at the front of our website:
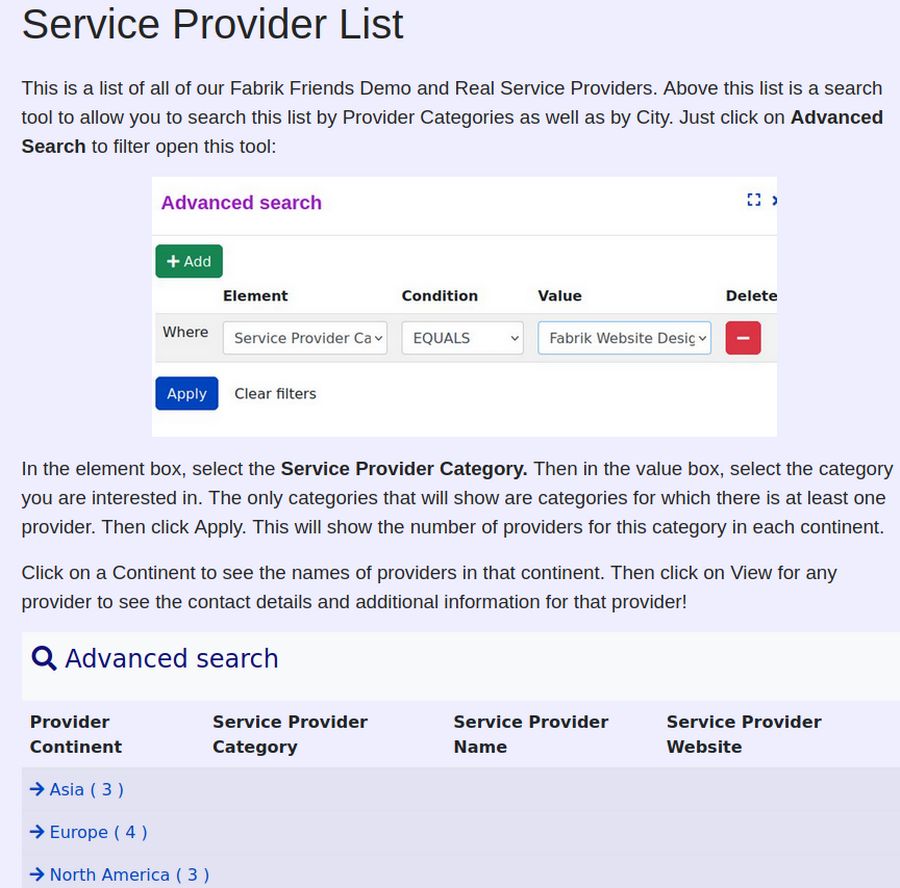
The Provider List is now much easier for Members to search.
Hide the Add, Group by and CSV buttons
Click on the Service Provider List to edit it. Then click on the Navigation tab. Increase the number of rows per page from 10 to 20. Also change Ajaxify from No to Yes. This will eliminate the need for users to refresh the page after filtering. Change Show Add, Show Navigation and Show Display Number from Yes to No. Then click Save.
We still need to hide group by and CSV. Click the Data, Group by tab. Change the Access for who can see the Group by button from Public to Member Coordinator. Then click the Publishing CSV tab and change the Front End export group from Registered to Member Coordinator. Click on the Details, Links tab. Check Hide Checkbox. Then click Save and Close and view the list. Sadly, the CSV export icon is still displayed. We will therefore need to add this CSS to our custom dot css file to hide it:
.dropdown-toggle.groupBy.btn {display: none;}
We will also add this to increase the font size of Advanced Search:
.advanced-search-link {font-size:24px; color: #111177;}
What’s Next?
In the next article, we will explain how to create, export and import a new content type.