
In the last article, we created our custom Member Registration form. In this article, we will finish building this form. There are three basic steps to completing our custom Member Registration form. The first step is to decide which elements should be used in the Member Registration form and how these elements should be grouped. The second step is to create the groups that we will use on the Member Registration form. The third step is to add elements to each of our Member Registration form groups. In this article, we will take a closer look at all three of these steps.
Step 1 Decide which elements should be used in your Member Registration Form
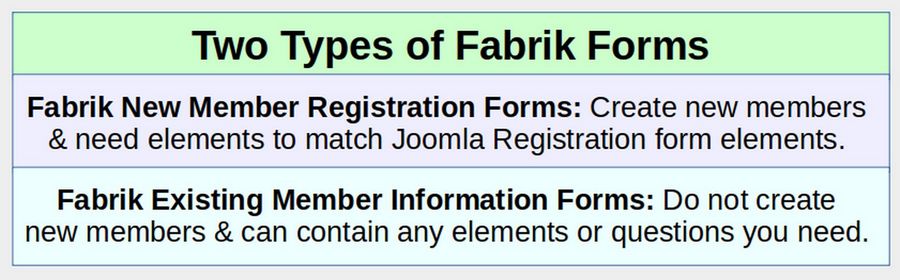
Fabrik Forms can be divided into two different Types. These two types are New Member Registration forms (forms that create a new member) and Existing Member Information forms (forms that collect information about existing members but do not create a new member). These two types of forms use different elements because the Fabrik New Member Registration form needs to have elements that precisely replace and sync with the elements in the Joomla Registration form - while Fabrik Existing Member Information forms can contain any kind of information you need but should not contain any of the elements used in the New Member Registration form.
This separation of New Member Registration forms versus Existing Member Information forms is so important that I have created this graphic to help us remember the difference between these two types of Fabrik forms:
With Fabrik Existing Member Information forms, it is common to simply keep all of the questions in the default Fabrik group that is automatically created when you create the form and has the same name as the form. However, to clearly separate elements or questions needed to replace the normal Joomla Registration form questions, it is useful to divide your New Member Registration form questions into at least five groups.
The first group will be to hold some of the hidden Admin fields we will need when we create our Member Registration form. We will call this group 0 Admin Info. The second group of questions will be only those questions needed to replace the Joomla Registration form questions. We will call this group 1 Member Info. The third group will contain any other questions you want to ask new members. We will call this group 2 Member Benefits. The fourth group contains questions where members can indicate options they want. We will call this group 3 Member Options. The last group is used to separate the Form Spam Filter from the rest of the form. We will call this group 4 Prove you are human. You can add more groups of questions if you have a very long form that you need to break up. But for the sake of simplicity, we will just use these five basic groups. Therefore, in Step 2 below, we will create the five following groups:
0 Admin Info (for hidden Admin fields)
1 Member Info (this is the basic Joomla Registration form)
2 Member Benefits
3 Member Options
4 Prove you are human
Questions or elements needed to replace the Joomla Registration form elements
We will cover assigning some of the hidden Admin fields to the Admin group in the next section. First let’s take a closer look at the elements we will use in the 1 Member Info Fabrik Group. These are the elements or questions we need to replace the Joomla Registration form elements. The Joomla Registration form asks new members the following four questions: Name, Username, Email and Password.
The Joomla Registration form then adds four hidden elements assigned to the new member when they submit their form: User ID, User Group, Block Element, Password Reset
The User Group is the Joomla Group assigned to the new member which is typically the Registered Joomla User Group. The Block element is a YES/NO question about whether the user is blocked from logging in.
The Password Reset Question is used to determine if the member is required to reset their password when they first log in. Password Reset is only required when an Administrator has completed the form for the new Member and given the new member a random password that needs to be changed by the new member to whatever the new member wants to use for a password.
Since we want to retain the full functionality of the Joomla Registration form, we need to add Fabrik elements to replace all 8 of these Joomla elements. To help us tell the difference between Fabrik Element Names and Joomla Element Names, we will add the word Member at the beginning of each Fabrik element. Therefore, these are our 4 required and displayed Fabrik elements: Member Full Name, Member Username, Member Email, Member Password
We also need this required visible element: Member User Group
These are our three required and hidden Fabrik elements:
User ID, Member Block, Password Reset.
In addition, we will add two more elements to our Fabrik New Member Registration form. These are Member First Name and Member Last Name. These two additional questions are needed because often we will want to sort members by their last name. The Joomla Name element does not give us this important information. It only tells us the full name of the new member.
So that new members do not need to type in their first name, last name and full name, we will only display the First Name and Last Name questions. We will hid the Full Name Question and then use the Fabrik Calc Element to create the Full Name value by adding the values for the Member First Name and Member Last Name.
The following 5 elements will be the only fields a new member needs to fill out: Member First Name, Member Last Name, Member Username, Member Email and Member Password.
Move some of our hidden fields to our Admin Group.
All of the remaining 4 elements will be hidden: Member Full Name, User ID, Member Block and Password Reset. But because Member Full Name is linked to our First Name and Last Name fields, we will keep it in the 1 Member Info group. Member User Group will also be in the 1 Member Info group. The remaining three hidden elements, will be in our 0 Admin Info group. They can all be moved after they are created or assigned to the 0 Admin group when they are created.
Questions we will add to our 2 Member Benefits Group
While you can add as many questions as you want to this area, to keep things simple, we will only add add three elements or questions. The first question is a required radio button which must be checked to join the group. The first question has a summary of our Community Network Benefits and Rules. Checking the box indicates that the new member has read and agrees to our Community Network Rules. The second question is the Member City and the third question is the member Country. This information will allow us to help members in a given city or country network with each other.
Questions we will add to our 3 Member Options Group
The first question is three or more check boxes where members can indicate which combination of member options they would like. Some may just want to be a normal Member and view our Provider Lists. Others may want to also be a Service Provider. The second question is a space where a new member can ask a question or provide any additional information about themselves that they want to provide. This is an optional question.
Questions we will add to our 4 Prove You Are Human Group
There is only one question in this group. It is our spam filter challenge. Because there are privacy and data mining issues with the Google Spam filter, we will use the Fabrik Spam Filter instead of the Google spam filter.
Step 2 Create your Custom Member Registration Form Groups
Fabrik Groups are collections of elements present on a form. Groups help break up a long form into shorter sections. Groups also allow us to put an explanation at the beginning of each group section to help guide new members as they fill out the questions in that group. Fabrik Forms can contain multiple groups and an element must be assigned to a group to appear in the form. As we explained earlier, our Member Registration form will have 5 groups.
0 Admin Info (three admin hidden fields)
1 Member Info (this is the basic Joomla Registration form)
2 Member Benefits
3 Member Options
4 Prove you are human
Tip: Because Group Labels and Element Labels are used as column headings, keep both Group and Element Labels as short as possible.
Create Your First Group… 1 Member Info
To create a new group, go to Groups, New.
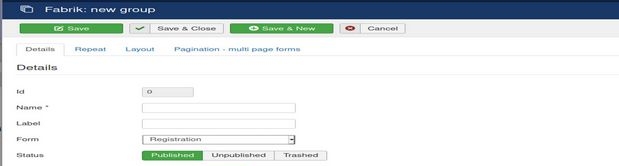
The screen opens at the Group Details tab. There are also three other tabs we will review later called Repeat, Layout and Pagination.
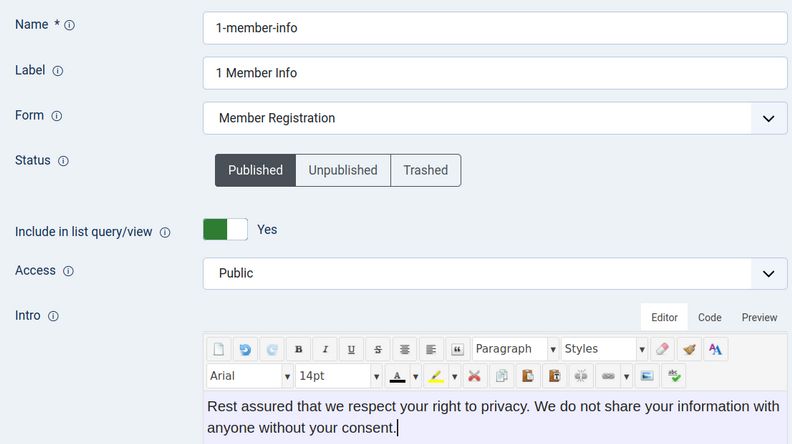
The Name box is used for the internal Groups table. It does not appear on the front end of your website. For Name, type lower case with no spaces: 1-member-info
The Label is what appears on your front end form. For Label, type:
1 Member Info
For Form, assign the group to the Member Registration form.
For Intro, type: Rest assured that we respect your right to privacy. We do not share your information with anyone without your consent.
Then click Save and New.
2 Create Your Second Group… 2 Member Benefits
For the second group Label, type: 2 Member Benefits
For Name, type lower case with no spaces: 2-member-benefits
For Form, assign the group to the Member Registration form.
For Intro, type:
Fabrik Friends Member Benefits
Membership allows you to view our searchable lists of Service Providers and post questions and comments on our Fabrik forum. Once you are a member, you can also apply to become a service provider by selecting one or more of the categories below. Please note: You must click the Agree to our Membership Rules button in order to join our group!
Membership Rules: You promise to be a positive and ethical member of our community and treat all of our members with respect and dignity.
Then click Save and New.
3 Create your Third Group… 3 Member Options
For the third group Label, type: 3 Member Options
For Name, type lower case with no spaces: 3-member-options
For Form, assign the group to the Member Registration form.
For Intro, type: Check one or more of the boxes below to let us know which Member options you would like.
Then click Save and New.
4 Create your Fourth Group
For the fourth group Label, type: 4 Are you a robot?
For Name, type lower case with no spaces: 4-prove-human
For Form, assign the group to the Member Registration form.
For Intro, type: Help us reduce spam by completing this task. You can do it!
Then click Save and New.
5 Create your Admin Group
For the fifth group Label, type: 0 Admin Info. For Name, type lower case with no spaces: 0-admin-info For Form, assign the group to the Member Registration form. Then click Save and Close.
5 View your Custom Field Groups
Filter for the Registration form groups. We now have our five custom Fabrik groups plus a group called Member Registration that was created automatically when we created our Registration form:
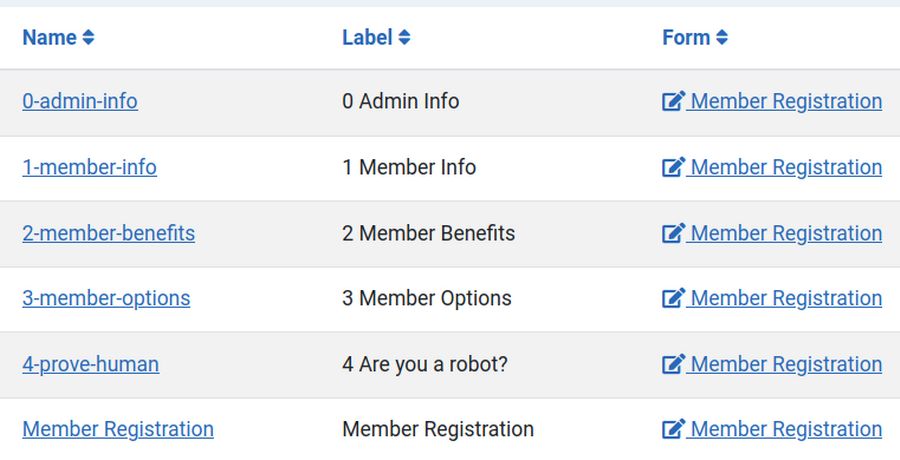
We are now ready to add our elements to these five groups.
Add 7 Elements to our 1 Member Info Group
Next we will add the Member First Name, Member Last Name, Member Full Name, Member Username, Member Email, Member Password and Member Usergroup to our 1 Member Info group. These 7 required elements will be created using the standard field element with the exception of the Member Full Name which will use the Calc element and Member Usergroup which will use the Usergroup plugin.
To add an element to our Registration form, go to the Forms screen. Then in the Element column, click either Add or the + icon. You can also bring up the new element screen from the Groups Table by clicking Add to the right of the group you want to add the element to. Once you clicked the Add link or the + icon, you will see the Fabrik: new element Edit page.
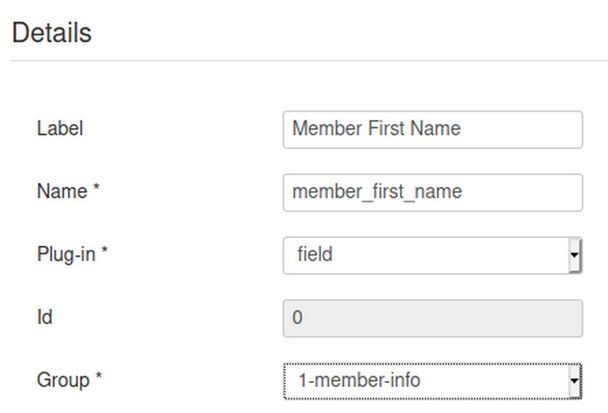
Type Member First Name into the Label box. Fabrik will type the lower case member-first-name into the Name box. For Plugin, leave it at the default value – which Fabrik calls field. Leaving it at this value will result in four Settings tabs displaying at the bottom of the screen. These are Options, Advanced, Formatting and Guess link. Generally for a simple field, all four tabs can be left at their default values. For the Group box, use the drop down to select 1 Member Info. Then click Save and New.
The label for the second element is Member Last Name. Fabrik will type the lower case member-last-name into the Name box. For Plugin, leave it at field. For the Group box, use the drop down to select 1 Member Info. Then click Save and Close.
Before we create our third element, we need to make sure we know the exact full element name used for our first two elements. Click on Fabrik Elements and copy the values shown in the Full Element Name column. In our case, the full element names were:
afc_member_registration___member_first_name and
afc_member_registration___member_last_name
Now click Forms, Add to add our third element. The label for the third element is Member Full Name. Fabrik will type the lower case member_full_name into the Name box. For Plugin, change it to calc. We will use calc to combine the first name and last name into the full name.
For the Group box, use the drop down to select 1 Member Info. For the Options tab, change Hidden from No to Yes. Then click on the More tab. For calculation, copy and paste:
return '{yourtable___firstname}' . ' ' . '{yourtable___lastname}';
In our case, we copy pasted:
return '{afc_member_registration___member_first_name}' . ' ' . '{afc_member_registration___member_last_name}';
Then click Save and New. The label for the fourth element is Member Username. The plugin is field. The group is 1 Member Info. Click Save & New.
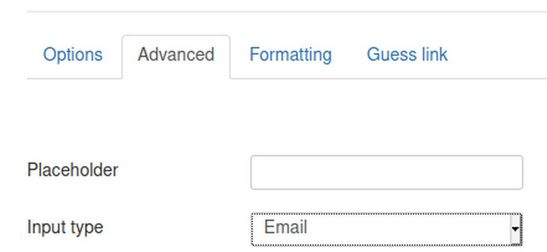
The label for the fifth element is Member Email. The group is 1 Member Info. But do NOT click Save! Instead, click on the Advanced tab. In the Input Type box, select the Email option.
Then click Save & New. The label for the sixth element is Member Password. The group is 1 Member Information. For plug, use the drop down to change the plugin from field to password. Then click Save and Close.
Add Member User Group element to our 1 Member Info Group
Adding the User Group element with the User group plugin will allow admins to manage user groups in the front end and back end of our website and also allow us to sync the Fabrik User Groups with the Joomla User Groups. Also, it will allow us to assign members to more than one group.
There is a huge problem with the J User plugin. If you do not add the User group element, the J User Plugin will restrict members to whatever group is set with the J User Plugin.
Regardless of the other groups the member was assigned to, they will be moved to that one group. So if you want a member to belong to more than one group, you need to add the Usergroup plugin.
Some are reluctant to use the User Group plugin because the are afraid that if they fail to properly hide it from members, members might be able to change the group they belong to. However, the User Group element has an Access screen that allows us to control who is allowed to see this element on the Registration form. We will set it so that only Member Coordinators and Super Users see this element.
In addition, we will set the Usergroup element to not show in the List and to NOT be hidden on the setting inside the element. This will make it so the group settings are only shown inside of the Registration edit form. Finally, we will put the Member list in a menu that is only accessible to Super Admins and specially trained Member Coordinators.
Create a Member Coordinator Group and Access Level
We need to assign the next element to a Front End Member Coordinator Group. If you have not already done so, click Users, Access and click New. For Title, select Member Coordinator. For groups, check Member Coordinator Members Team, Tech Team and Super Users. Then click Save and Close.
Create the Member Usergroup Element
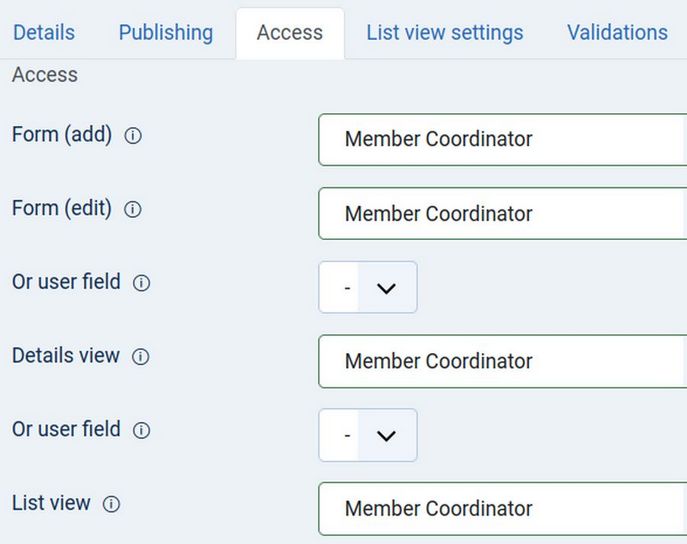
To create the Member Usergroup element, go to Fabrik Forms Member Registration and click Add. For Label, type Member Usergroup. For name, type member_usergroup. For Plugin, select usergroup. For Group, select the 1 Member Info Group. Then leave Hidden set for No so that Admins will be able to see and adjust the Member User group from the front end. Then click on the Options tab. Change Default to current users groups from Yes to No. Then click the Access screen. Change Form Add, Form Edit, Details View and List View to Member Coordinator:
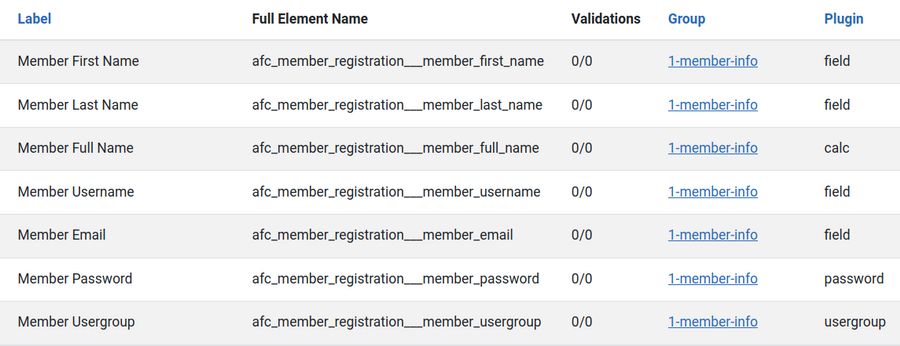
This important step will prevent members from seeing the Usergroups on their Registration forms. Then click the List View Settings screen. Click on the Filters tab and change Include in Advanced Search from Yes to No. Then click Save and Close. Filter Elements for the 1 Member Info Group. Change Show in List for First Name, Last Name and Email from No to Yes. Here are our 7 elements in the 1 Member Info group:
Add 3 Hidden Elements to our 0 Admin Info Group
Next we will add the Member Userid, Member Block and Member Password Reset elements to our 0 Admin Info group.
The Member Userid element will be a simple field. But the Member Block and Password Reset will be created with the Yes-No element.
Three Options for the Member User ID element
A Fabrik User ID element is needed to match the Joomla User ID. However, you should not use the Fabrik Form ID element (the one that is created by default when we create any new Fabrik form) as that is ID used by Fabrik for internal form control and should not be matched with the Joomla User ID element. Therefore, we need to create another element besides the Fabrik Form ID element to store the Joomla User element. To further confuse beginners, the new User ID element is also called the Primary Key element or the PK element.
Some tutorials suggest using the User plugin on the Member Registration form. However, the User Plugin is best used on forms which do not create a new member. A second option suggested in some tutorials is to use a database join element to create a database join between the Joomla User ID in the Joomla table to the Fabrik User ID in the Fabrik table. However, this is a complex solution that is easy to do wrong. Also it is useful primarily if you want to use the database join to display the Joomla Full Name and Email – which we do not want to do.
So instead, we will use the default field plugin to create our User ID element. This will require setting the Fabrik J User form plugin Sync function to Yes. We will explain how to do this below.
Add the Userid element to our 0 Admin Info Group
Go to Forms. Member Registration and click Add. For Label, type Userid. For name, type userid. For Group, select the 0 Admin Info Group. Change Hidden from No to Yes. Then click Save and New.
Add the Member Block element to our 0 Admin Info Group
The "Block" element in the jUser plugin sets and synchronizes with Joomla user's "Enabled" or Disabled settings to Enable or block this user. The Joomla default value for Block: 0 = enabled / unblock; 1 = disabled aka block. To add a Block element, click Add. For Label, type Member Block. For name, type block. For Plugin, select the Yes- No plugin. For Group, select the 0 Admin Info group.
In the Options tab, set Hide the element to Yes. Then click on the Advanced Tab. The Default Value is set for No which means that Enable is the default value. We will therefore leave the Advanced tab at their default values. Click Save and New.
Create the Member Password Reset element
For Label, type Member Password Reset. For name type member_password_reset. For plugin, select Yes-no. For group, select 0 Admin Info. For Hidden, change it to Yes. For Advanced, leave it at the default value of No and click Save and Close. Filter for the 0 Admin Info group. Here are our 3 hidden admin elements:
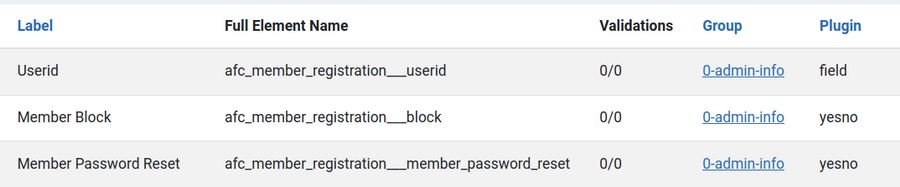
We have finished adding elements to our first two Member Registration form groups. We are now ready to add and set up the J User Plugin
What’s Next?
In our next article, we will set up the J User Plugin to connect our Fabrik form to the Joomla User Management Table. We will then finish creating our Member Registration form.