
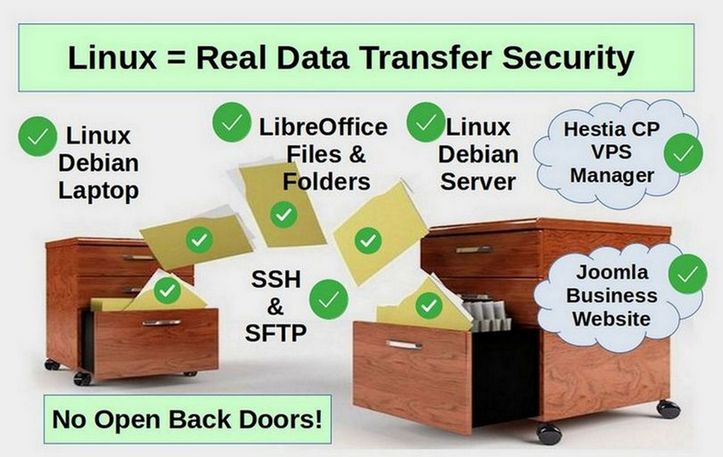
Creating your own community network can be a lot of work. It is important that your network be securely constructed and managed to prevent it from being taken over by hackers. In this article, we will review the first step in creating a secure community network. This is reflashing at least one of your computers to Linux Debian so that you will have at least one secure computer that you can use to access your network. To be clear, it is not wise use a Windows computer to access the back end of your community network. If your Windows computer is compromised, it is only a matter of time until your website and community network will also be hacked. Here is our plan to build a secure foundation for our community network:
Step 1 Create a Debian Live USB
The first step is to create a Linux Debian Live USB. The first step in this process is to get two empty USB 3 drives. Use the first drive to make a copy of all of your documents on the computer you will be reflashing. Depending on how many documents, images and videos you have on your computer hard drive, this USB 3 drive may need to be 64 GB to 128 GB.
Note: Reflashing a computer will delete all documents and programs on the computer. Please copy all documents and make a list of all programs that you want to re-install after reflashing your computer.
The second USB drive will be converted into an Linux Debian 11 Live USB. It only needs to be 8 GB. I recommend Sandisk USB drives.
Download the Linux Debian 11 ISO File
Go to this page to download the 64 bit version of Linux Debian Cinnamon ISO file with non-free software (the non-free software may be needed to install WIFI and Printer drivers on your computer). The exact link changes as new versions of Debian are released. Therefore, we will start at this page:
https://cdimage.debian.org/cdimage/unofficial/non-free/cd-including-firmware/
Then click on the current-live folder. Then click the amd64 folder. Then click the iso-hybrid folder. Scroll down and click on cinnamon + nonfree.iso option. Then click on it to download it. Save this file to your home computer. It will be about 3.4 GB.
Download Etcher
We will use Etcher to create our live USB. Go to this page to download Etcher. https://www.balena.io/etcher/
Extract the zipped file to reveal the App Image. Then click on Etcher to bring up this screen:
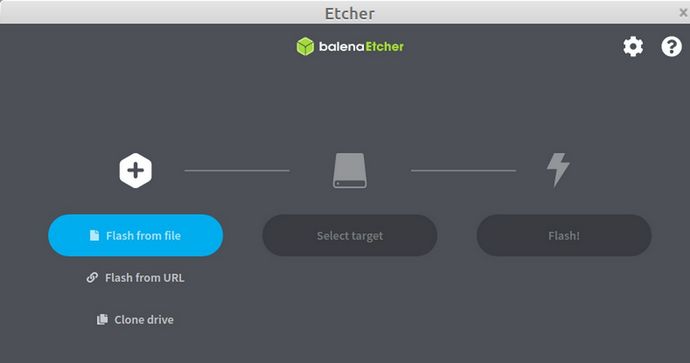
Click Flash from File. Then navigate to the Debian 11 non-free iso file to select it. First insert a USB drive into a USB port. Then click Select Target and navigate to your USB drive. Note that whatever is on the USB drive will be erased during the installation of Debian. Then click Flash to flash the USB drive with Debian. When done, you will have a Linux Debian Live USB. You can use this USB to reflash as many computers as you want.
Step 2 Reflash a computer using a Linux Debian Live USB
Once you have created a copy of all of your documents and placed them on a separate USB drive and made a list of all of the programs you want to replace once you have reflashed your computer, you are ready to start the reflashing process.
First, it is best to have your laptop connected to your router with an Ethernet cable (it is also possible to use WIFI but it is not as secure or as faster as using an Ethernet connection). Then place your Linux Debian Live USB into a USB 3 port on your computer. Generally USB 3 ports are on the left side of your laptop as you are facing your open laptop screen. Then turn on the computer and immediately press whatever keys are needed to enter your BIOS settings. On a Dell computer, it is usually F2. On a Lenovo, it may be the Function key plus the F2 key. On an HP laptop, it might be the Escape key.
Once you enter your BIOS, go to the Boot Settings to make sure that the laptop is set to boot from a USB drive before booting from the internal hard drive. If your laptop has the option to boot from Legacy or UEFI, choose the Legacy Mode. If your laptop has the option to turn off secure boot, then turn off secure boot. You may need to do an online search to determine the best options for your particular computer. Here we will review the process for a Dell E6520.
Once the BIOS has been set to boot from a USB in Legacy mode, click Save and Close. In a few seconds, you should see the GRUB2 screen with Linux Debian as the first option. Wait a few seconds and the Debian Calamares Installer Welcome screen will appear.
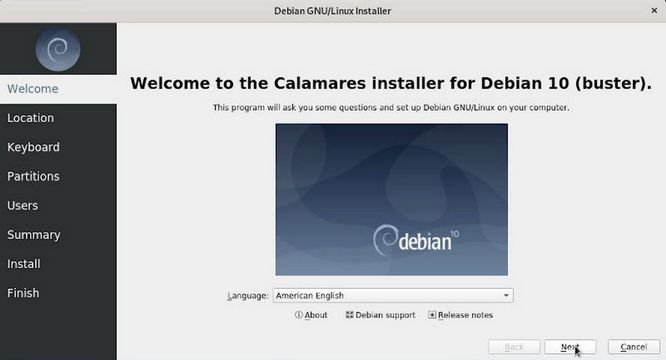
At the Debian installer first screen, leave the Language at American English. Then click Next. For Location, click on your time zone. Then click Next. For keyboard, click US and click Next. For Partitions, click on your hard drive at the top of the screen to select it. Then click Use the Entire Drive. Note that I recommend leaving Encrypt System unchecked. Then click Next. On the Users screen, enter your username and password. You can also check the box to automatically log in. Click Next. The Summary screen will show the Installation summary. Click Install. The Install screen will show the Installation progress. The Finish screen will state All done and ask if you want to restart now. When you restart, quickly remove the USB Live stick!
Step 3 Configure your new Linux Debian Laptop
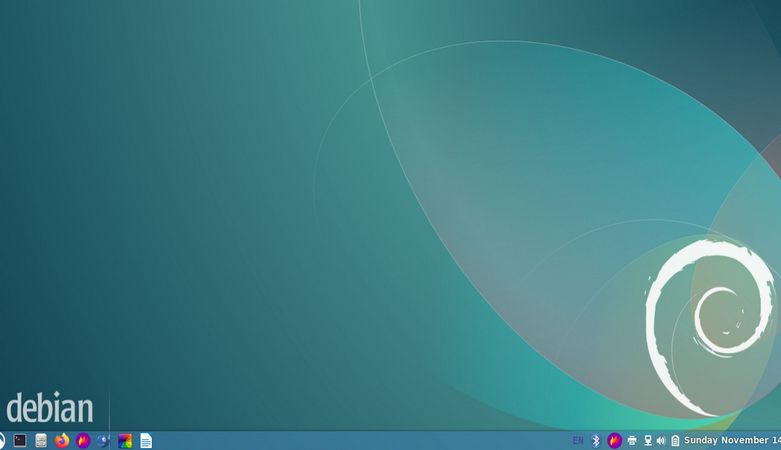
Let's review some important first steps to take after reflashing to Linux Debian. When you restart, your laptop should boot into the Debian Cinnamon Desktop screen with the Start programs button in the lower left corner
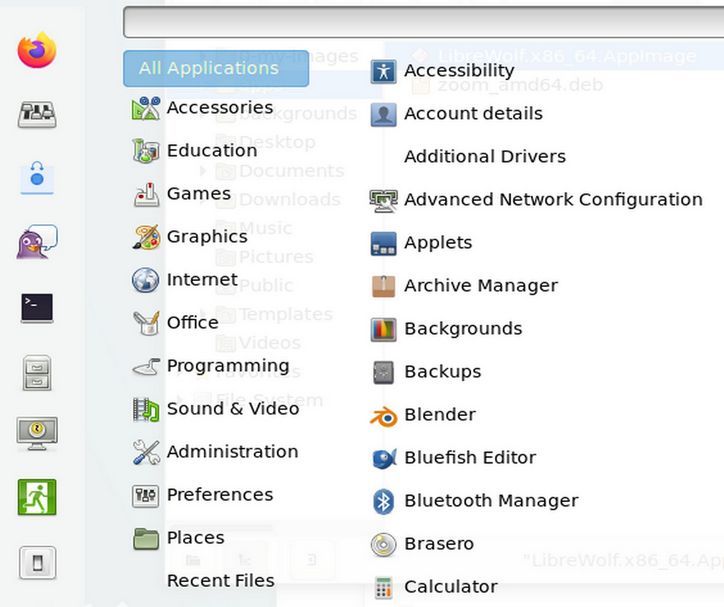
Click on the Debian Menu in the lower left corner to bring up the Programs Launcher:
Debian 11 now comes with the Debian Software Manager. It is the blue and white shopping bag near the top of the left column. How it got added to the Favorites column was by clicking on Administration, then click Software. Then right click and click “Add to Favorites.”
Change Debian Settings
Go the Debian Start menu and click on System Settings which is the second icon in the first column. Below is the first row in System Settings. It is called Appearance.
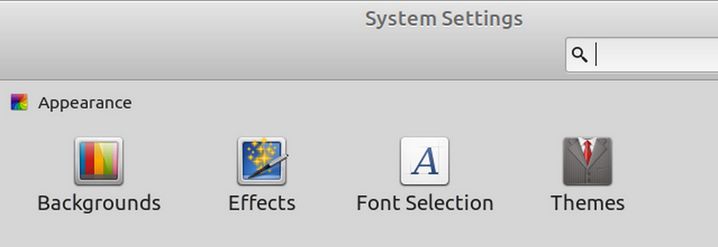
Click Backgrounds where you can change your background image, add your own custom images and even set up a slideshow to play on your Desktop. Then click Effects. Turn off all of the Effects. Then click Font Selection to increase the font size. Then click Themes to change themes for your panels and windows to whatever you want.
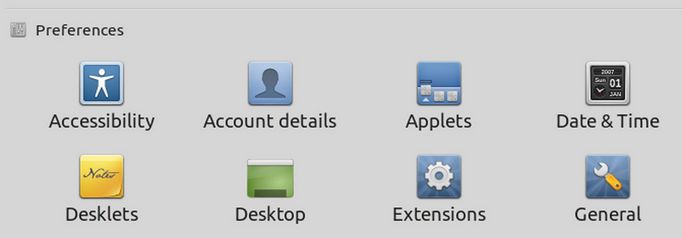
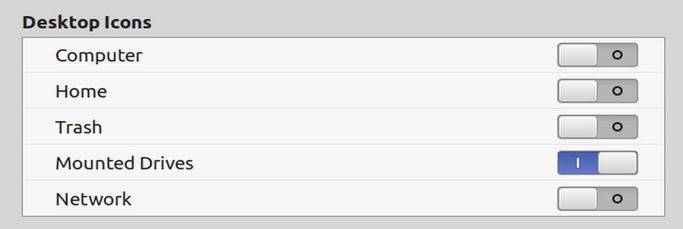
The second set of rows in System Settings is called Preferences. Click Date and Time. Turn off the 24 hour clock and turn on the date. Then click Desktop. Check Mounted Drives to make sure they appear on the Desktop when you insert a USB stick.
Scroll down to the Screen Saver icon and open it. Change the Delay time to Never and turn off both Lock settings. The third set of rows is called Hardware.
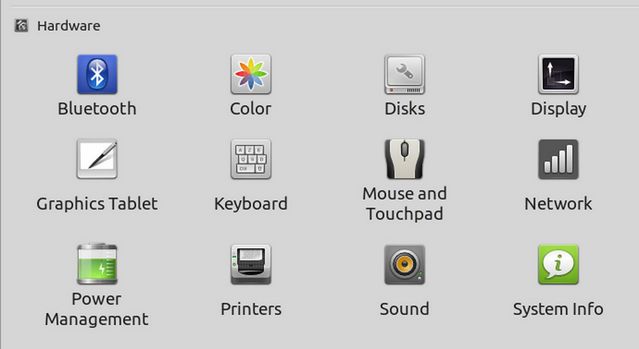
Click Power Management. Change the settings to Never and Shut down immediately. Then click Sound. Click Settings to increase the maximum sound to 150%. Then close the Settings screen.
Add Software
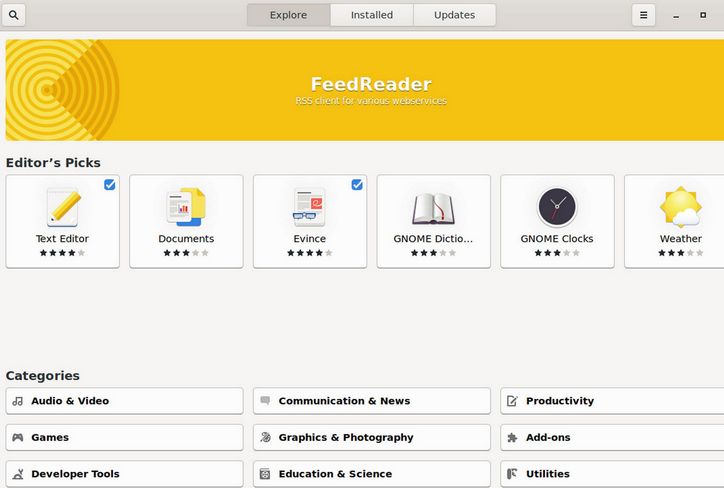
Click on the Start button. Then click on the Shopping Bag icon to go to the new Debian Software Manager:
Click on the Search icon in the upper left corner to bring up a Search box. Then type Flameshot in the search box.
Then click on Flameshot to bring up the Install page. Then click on Install to install Flameshot screen capture tool. Then look for it in the Applications list and right click, then click Add to Panel to add it to the program quick launch icons in the bottom panel.
Then go back to the Debian Software Manager and install the Bluefish HTML editor. Also install Krita and Gpick and Gparted. Then click on Installed to see a list of all programs and an easy way to uninstall any programs that you do not want or need. Then close the Software Manager.
Improve the Appearance of the Debian File Manager
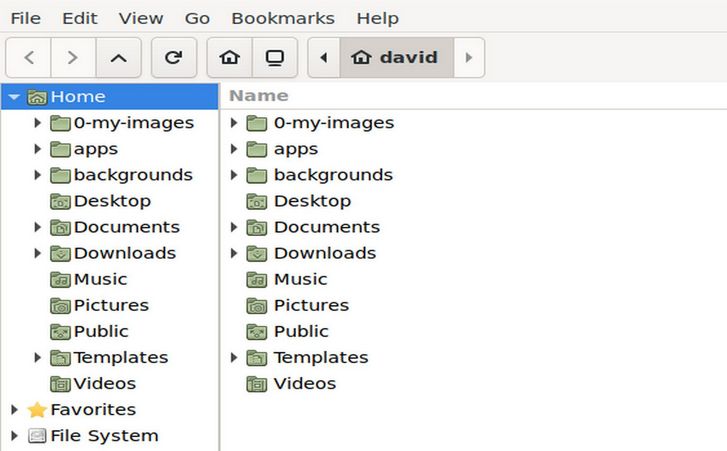
Click on the Filing Cabinet icon in the bottom task bar to bring up the File Manager. Right click on the screen and click Create New Folder. Then create a folder called 0-my-images. Then right click on the screen again and create a folder called apps. Then click Edit Preferences. Change the Default View to List View. Click List Columns and uncheck Type. Then click Toolbar and click Computer, New Folder, Refresh and Home. Then close Preferences. Then click the Refresh button. In the lower left corner, click Show Tree View.
Your file manager should now look like this.
Install a More Secure Web Browser called Libre Wolf
Next, we will install an apt image called the Libre Wolf Browser. Go to this web page: https://gitlab.com/librewolf-community/browser/appimage/-/releases
Download the app image to your Downloads folder. Then create an apps folder and transfer the app image to your apps folder. Then right click on the file and click Properties. Then click the Permissions tab and check Allow executing file as a program. Then close the Properties screen. Left click on the Mint Menu and click Configure. Then click Menu. Then click Open the Menu Editor. Then click Internet . Then click New Item.
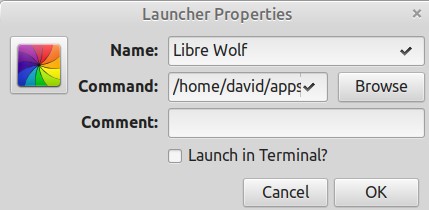
Call it Libre Wolf. Browse to the app to select it. Then click on the icon to select an icon. Then click OK. Then add the app to the panel.
Now that we have a secure Linux computer, let's review how to use your Linux Debian computer to create a Linux Debian Virtual Private Server (VPS) and then install the free open source Hestia Control Panel on your VPS.
Notes on Using Libre Wolf
Libre Wolf provides much more security and privacy than normal web browsers. However, please be aware that many functions will not work with Libre Wolf. In particular, when making changes with the Hestia Control Panel or the Joomla Dashboard, you should use the Firefox browser and NOT the Libre Wolf browser. You can however view the changes on the front end of your website using the Libre Wolf browser. Libre Wolf also disables the auto play feature of background videos and other videos. To see this, visit the Home page for collegeintheclouds.org. There is a background video in the header but it does not play in Libre Wolf. To allow auto play, open your Libre Wolf browser and click on the menu in the upper right corner. Then go to Settings, Privacy and Security tab. Scroll down to Permissions, Autoplay and click Settings. Then change Autoplay from Block to Allow Audio and Video.
Create a VPS with a Hestia Control Panel
Now that we have a secure Linux computer, we will review how to use your Linux Debian computer to create a Linux Debian Virtual Private Server (VPS) and then install the free open source Hestia Control Panel on your VPS.
Step 1 Register at Canhost
I have written a detailed article explaining why I recommend Canhost to host your VPS. Here is a link to this article:
https://createasecurewebsite.com/first-steps/2-create-a-secure-vps/2-1-choose-a-secure-vps-host
To register for an account, go to the Canhost Home page: https://www.canhost.ca/
Click Log In in the top menu. Then click Sign Up.
Use a secure Protonmail email address. Also use a password that is at least 10 digits long with at least one capital letter, one lower case letter, one digit and one special character.
Step 2 Get a new domain name hosted by CanHost to use for your VPS name server
Alternately you can transfer a domain name to Canhost. However, because the domain name should be directed to CanHost servers, you will also need to transfer the files and database to CanHost if you want to use an existing domain name. This creates a Chicken and Egg problem because we really want to transfer the files and databases of existing websites AFTER setting up our Hestia Control Panel. Your domain name should point to the Canhost servers. Eventually, you should transfer all of your domain names to Canhost in order to use the Canhost DNS Manager to point these domain names to your Canhost VPS.
Step 3 Order a Debian 11 VPS with at least 4 GB of RAM
From the Canhost Home page, click Hosting, Canadian VPS. Then click VPS EXPRESS 1. Increase Amount of RAM from 2 GB to 4 GB.
Change the Operating System from Centos to Debian 11. Change Control Panel from cPanel to No Control Panel. The monthly fee for this VPS is $18 US Dollars. The DISC space is 20 GB. But because 10 GB will be taken up with Debian, Hestia and other programs, this leaves only 10 useable GB. Consider increasing the Disc Space to 30 GB which will increase the useable GB to 20 GB.
For Hostname, type ns1.yourdomain.com where yourdomain.com is a domain name pointing at the default Canhost servers. This is your server Fully Qualified Domain Name (FQDN) we will use when installing the Hestia Control Panel. Use a password has at least 10 digits long with at least one capital letter, one lower case letter, one digit and one special character. For System Username, use a name with lowercase letters and no spaces.
Write down your VPS username and password as you will need both to log into your VPS server! Leave the SSH box blank. Then click Continue. Pay for the VPS and wait a few hours. You will get an email letting you know your two custom VPS IP addresses.
Step 4 Change your server domain name DNS Records
Log into your Canhost account and click My DNS. Then click on the Edit button to the right of your server domain name to view your domain name DNS records.
Change the IP addresses of the first four A Records
At the top of the Records table, there are four A records which all point to the Canhost IP address. Fully delete the Canhost IP addresses. Then copy paste your primary IP address in all four boxes. Then click Save and the bottom of the screen.
Create A records for ns1 and ns2
ns1 and ns2 are sub domains of our primary domain. For example, if your domain is example.com and you want to name your server ns1.example.com, then create the A record for ns1 in the example.com DNS zone pointing to your VPS primary IP address. To create an A Record, click Create Record. Then change the record type to an A record and type ns1 for the name.
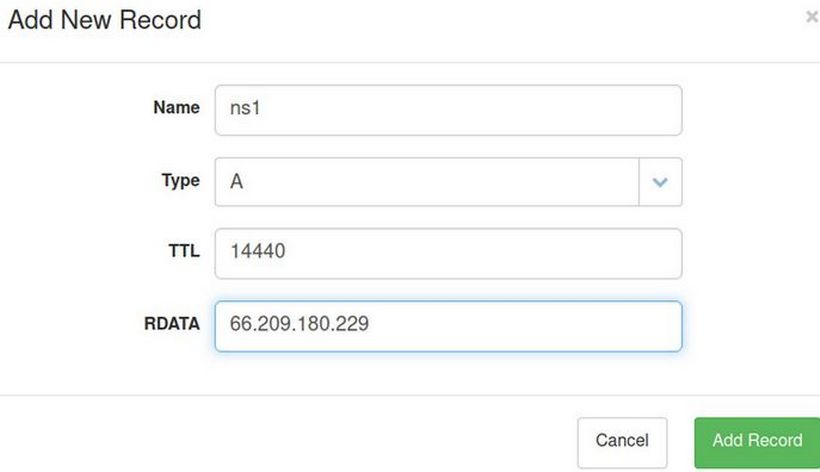
Copy paste your VPS Primary IP address and put it in the RDATA box. Then save and close the file and repeat to create an A record for the sub domain ns2.
Create two CAA records
Create CAA records by clicking on Add Record. Use the Type drop down arrow to choose CAA.
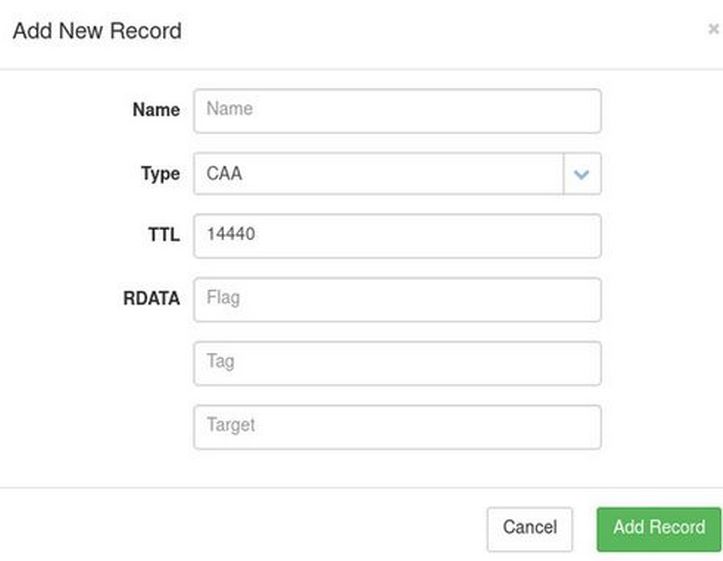
Then type your domain name such as mywebsite.com into the Name box. Type the number 0 into the Flag box and the word issue into the Tag box. Then type the domain name letsencrypt.org into the Target box. Then click Add Record. Then click Add Record again and create a second CAA record with the Tag issuewild.
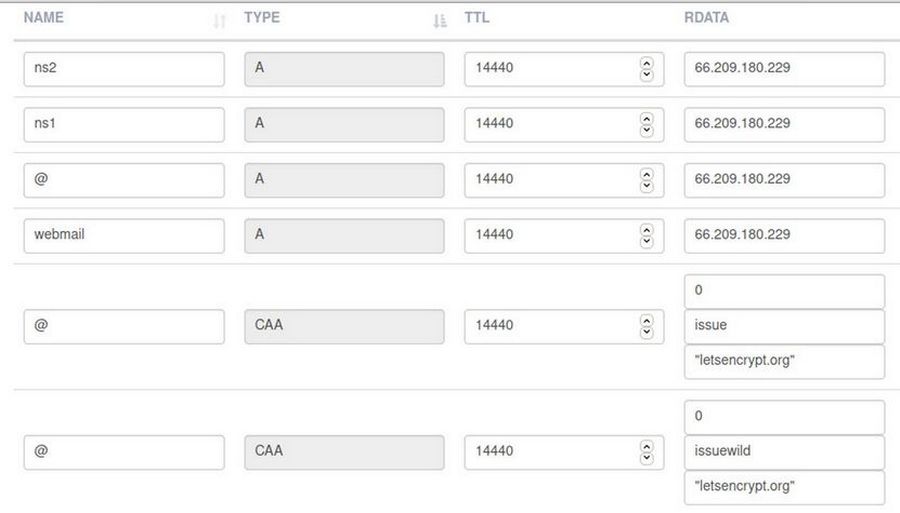
Here are my records for my domain name collegeintheclouds dot com. Note that there are A records for ns1 and ns2. that point to my primary IP address. Also there are two CAA records:
Leave the Canhost DNS records at the bottom of the DNS Records Table. Then click Save at the bottom of the DNS Zone Records table to save these changes.
Step 5: SSH into your VPS from your home computer terminal
Open a terminal on your home computer. Use the Primary IP address given to you by Canhost in their email to SSH into your new server from our home computer terminal with this command:
ssh yourusername@yourIPaddress>;
Example: ssh
Press Enter. Then type yes to accept the SSH connection. Then enter your VPS password and press Enter. Your terminal screen should then display the line that looks something like david at ns1. This means you are logged into your Debian VPS and can begin to edit its settings.
Step 6: Create a Root User and Password
We need to create a Root User in order to install the Hestia Control Panel. However, we need to change the SSH configuration file before we can create a root user. Once logged into your user SSH session, copy paste:
sudo nano /etc/ssh/sshd_config
to open the ssh configuration file. Use the down arrow to scroll down to PermitRootLogin. Delete the hash at the beginning of the line PermitRootLogin and set the value to yes:
PermitRootLogin yes
Save this file by pressing the Control key and the lower case o key at the same time, followed by pressing the Enter key. Close the file by pressing Control plus the x key at the same time. To make the new setting take effect, restart the ssh service:
sudo systemctl restart sshd.service
While VPS is running, and still in your user ssh session, copy paste the following into the ssh terminal: sudo passwd root
Enter your sudo user password. Then add a root password typing it twice. Reply should be: passwd: password updated successfully
Then log out of the user SSH session with exit. Then close the home terminal.
Step 7 SSH into your VPS as the root user
SSH into your VPS from your home computer terminal with this command:
ssh root@yourIPaddress>;
For example, ssh
When prompted for the password, use the root password you just created. Once logged in as the root user, uninstall the Canhost firewall called CSF with these commands:
cd /etc/csf
Press enter, then copy paste:
sh uninstall.sh
Then press Enter again. Go back to root with
cd /
Next, install the Midnight Commander graphical file manager with this command:
apt install mc
Midnight Commander is a graphical file manager that makes it easier to edit and move files in our VPS. We will use Midnight Commander to change some settings after we install Hestia.
Step 8 Install the Hestia Control Panel to your VPS
While logged in as root, copy and paste the following commands:
apt-get update
apt-get upgrade
Then open a browser and go to the Hestia control panel home page. https://hestiacp.com/
Step 3 on the Hestia Home page shows the normal install command:
wget https://raw.githubusercontent.com/hestiacp/hestiacp/release/install/hst-install.sh
Copy paste this into the ssh root terminal and press Enter. The above command is normally followed by bash hst-install.sh
However, we do not want clamav because it does very little and uses way too much ram. To avoid installing clamav, we will use this for the second command: bash hst-install.sh --clamav no
Then type Y. Then type your email and FQDN:

Then press Enter. After the installer finishes, it will end with Press any key to continue. Do not press any key! First, scroll up the page and copy paste the Hestia URL and password!!!
Admin URL: https://123.456.789.123:8083
Username: admin
Password: ImQwmOHv1rg1Yi9g
Then scroll back down the page and press Enter. Then close the terminal. The server will restart. You do not need to log into the server. Instead, open a browser and copy paste the Hestia URL: https://123.456.789.123:8083
You can also log in with the domain name:port number
ns1.example.com:8083
Either way, Firefox may state: Warning: Potential Security Risk Ahead. Click Advanced. Then click Accept Risk and Continue. The Hestia Control Panel Log in screen will appear:
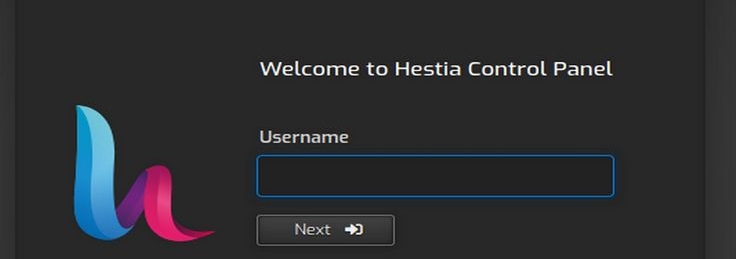
For username, type admin. Then click Next. For password, copy and paste the complex password: ImQwmOHv1rg1Yi9g
Step 9 Change the Background Color of the Panel
The dark panel is hard to read and hard to see on screenshots. Therefore, our first task is to change the background color of the panel to a lighter color. Click on the Settings wheel in the upper right corner. Then click Configure on the left side of the screen.
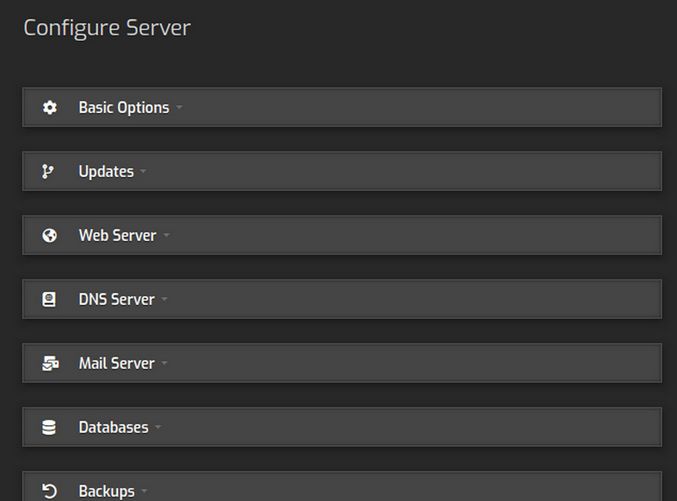
Then click Basic Options. Then use the Appearance drop down arrow to change from dark to default and click Save. Then click on the word Back to return to the main panel Settings screen.
Step 10 Change the Admin Password
Click on Users in the top menu.
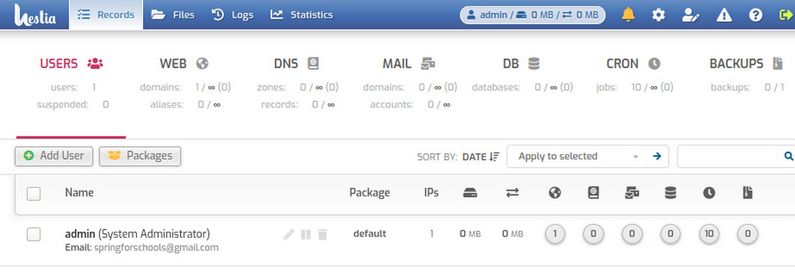
Then select the Admin User and click the Edit pencil. Type in an easier to remember password. Each Hestia password must be at least 8 characters long with 1 uppercase & 1 lowercase character and 1 number. Then click Save and Back to go back to the User screen.
Step 11 Use Midnight Commander to Change some PHP settings
The step only needs to be done once on your server. However, it should be done before you install your first Joomla website. One of the biggest challenges of working with a virtual server is that it does not come with a desktop environment. Rather than clicking buttons, you need to enter commands in a terminal. The problem with the terminal is that, it can be very difficult for visual learners (who make up half the population) to be constantly entering a series of complex commands into an abstract tool like the terminal. Thankfully, the Linux community also provides a graphical user interface for a server File Manager called Midnight Commander. We have already installed it. Here we will use it to change some PHP settings. SSH into your VPS from your home computer terminal with this command:
ssh root@yourIPaddress>;
For example, ssh
Then start Midnight Commander by typing mc
Then press Enter.
We need to edit the PHP ini file which is in the following path: /etc/php/8.1/fpm/php.ini
Note that the Line numbers in PHP 8 are slightly different than the line numbers shown below.
Click on etc to open your etc folder. Then click on the php folder to open it. Then click on the 8.1 folder to open it. Then click on the fpm folder to open it. Select the file called php.ini
After selecting php.ini, click File Edit to open the php.ini file. Type 1 to select the Nano editor. Then press Enter. Note that there are 1947 lines in this file. To add line numbers to the Midnight Commander edit screen, press Alt plus c to show the line numbers.
Use the down arrow to scroll down to line 215 which does not have a semi-colon in front of it and is therefore active. Change output_buffering = 4096 to output_buffering = Off.
Fix other bad PHP INI default settings
The PHP INI file also has several other truly ridiculous default settings that should have been updated years ago. Thankfully, these only need to be fixed once – when you are first setting up your VPS. Here are three important settings to change:
#1 Use the down arrow to scroll down to line 388. Change the max_execution_time from 30 to 300 (seconds).
#2 Scroll down to line 398 and change the max_input_time from 60 seconds to 600.
#3 Scroll down to line 409 and change the memory_limit from 128M to 256M.
#4 Scroll down to line 694 and increase post max size from 8M to 128M: post_max_size = 128M
#5 Scroll down to line 846. Increase upload max file size from 2M to 100M. (this will allow us to upload short videos).
#6 At line 849. Increase max file uploads from 20 to 40. This will allow us to upload up to 40 images at a time instead of the current 20.
#7 Then scroll down to line 874. Change default_socket_timeout from 60 to 600 (seconds).
Note that some values are related to other values. The order from biggest to smallest should be: memory_limit 256 > post_max_size 128 > upload_max_filesize 100
Then save the PHP INI file with Control plus o followed by Enter. Then close the file with Control plus x. Then click on the two dots a couple of times to go back to the etc folder.
Next open the /etc/apache2/apache2.conf file and change:
In the Global configuration section, Timeout increase from 30 to 300. Then save the file with Control plus o followed by Enter. Then close the file with Control plus x.
Open the /etc/nginx/nginx.conf file and change:
fastcgi_connect_timeout from 30 to 180s
fastcgi_read_timeout increase to 300s
proxy_connect_timeout from 30 to 600s
Then save the file with Control plus o followed by Enter. Then close the file with Control plus x. Then type the word exit and press Enter to close Midnight Commander without turning off your server. Then type exit and press Enter to close ssh session without turning off server. Then close the terminal.
Restart several Hestia Services for changes to take effect
Back at the Hestia Admin screen, click on Server settings, Configuration and restart apache, mariah db, nginx and php8.1-fpm You are now ready to add as many Joomla websites as you want!
What’s Next?
In the next article, we will use Hestia to install Joomla.