
In our last article, we added elements to the first two groups in our custom Member Registration form. These elements are needed to connect our Fabrik Registration form with the Joomla User Management system. In this article, we will use the J User Plugin to connect our Fabrik elements to their Joomla elements. We will then finish adding the remaining elements needed for our custom Member Registration form.
Connect Your Fabrik Member Registration Elements with their Corresponding Joomla Core Registration Fields
These elements are the basic Joomla user registration fields. However, your Joomla database does not know these elements exist. We need to connect these elements to our Joomla database. Click on Forms and click on your Member Registration form to open it. Then click the Plug-ins tab.

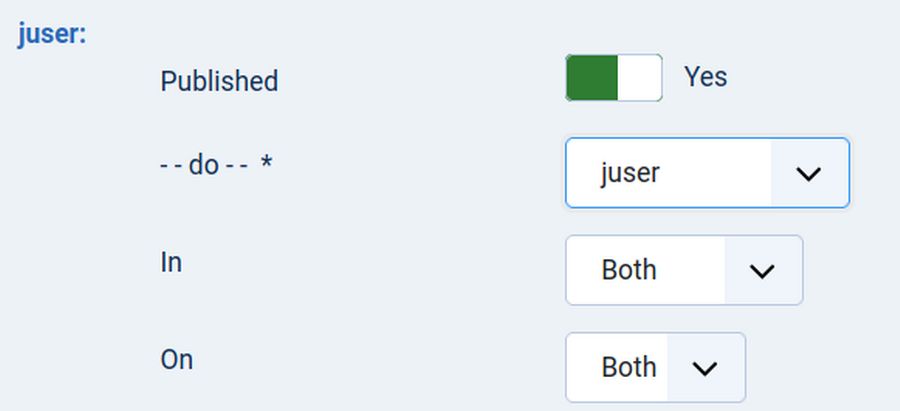
Then click Add. For the -- do -- setting, select juser. For the In setting, select Both. For the On setting, select Both.
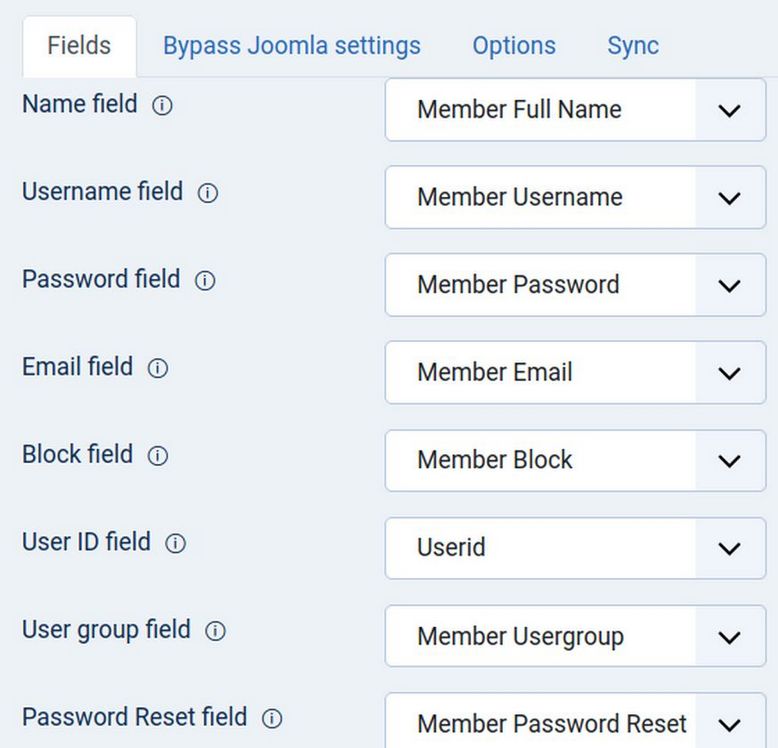
A new set of fields will appear below these fields called Binds data to a Joomla user account. It opens in the Fields tab. We will use this area to connect our Fabrik registration elements with their Joomla counterparts. In the Name field, select Member Full Name. For Username, select Member Username. For Password, select Member Password. For Email, select Member Email. For the Joomla Block field, select Member Block. For the Joomla User ID field, select Userid. For the Joomla User group field, select Member User group. For the Joomla Password Reset field, select Member Password Reset.
Here is what these 8 fields should now look like:
Then click on Bypass Joomla Settings. Change Bypass Activation and Bypass Registration to Yes.
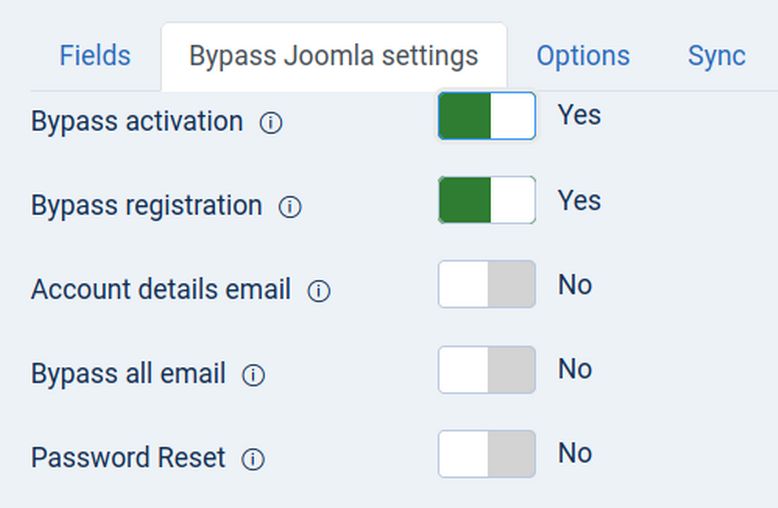
With these settings the member is created and activated automatically and no email is sent to the user. The benefit is we can cut down spam by leaving the default Joomla Registration process turned off. We also save our Admins from having to log into the back end to turn on the Member activation. The drawback is that no notification email is sent to Admins. However, we will fix this problem by adding a Form Email plugin to send a custom email to Admins.
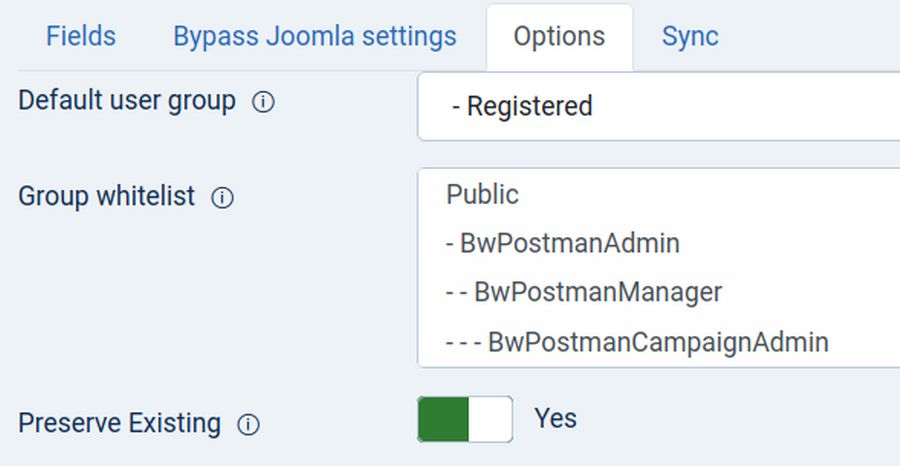
Click on the Options tab and change the default Usergroup from Public to Registered. This setting will allow your registered Members to log in and edit their Member profile. Also change Preserve Existing groups from No to Yes:
Click on the Sync tab. Change Delete Users, Sync Users and Sync on Edit to Yes.
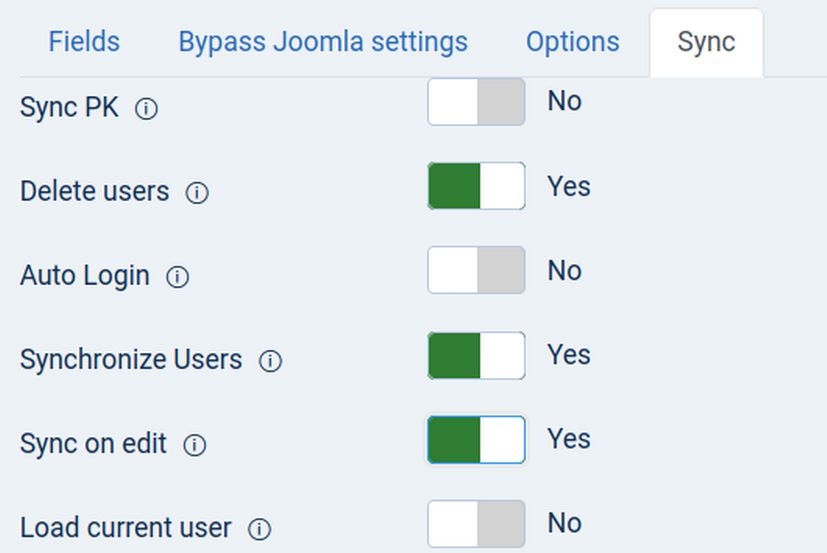
With these settings any member deleted by the Fabrik admin form will also delete the user from the Joomla user table. Click Save & Close.
Create a Signup Success article
Go to Content, Articles and click New. For Title, type: Signup Success! For text, copy and paste: Thank you for joining our Fabrik Friends community!. You can now log into our Members area by clicking on the Member Login button in the Main Menu!
Then click Save and Close. Then click on the Hidden Menu and click New. Click Select, Articles, Single Article. Then select the Signup Success article. For Title, type Signup Success. Then click Save. Here is the full URL:
https://fabrikfriends.com/sign-up-success
Add the Redirect Plugin to our Member Registration form
By default, when a new member submits their Signup form, they are automatically taken to the Member Login page which issues an error because they are not logged in. This looks really bad. Thankfully, Fabrik offers a Redirect plugin that solves this problem. Click Fabrik Forms, Member Registration form to edit it. Then click the Plugins tab again and click Add. For Do, select the Redirect Plugin. Then paste the URL of the Sign Up Success menu item into the Jump page box. Here is the full URL:
https://fabrikfriends.com/sign-up-success
Then click Save and Close. Then go to Extensions, Plugins. Click on User Joomla to edit it. Change Notification Mail to Users from Yes to No. Then click Save and Close.
Create the Admin Notice Article
We previously created an article called Contact Us Notice to send us an email whenever someone submitted a Contact Us form. We now will create another article to send us an email when someone submits a Member Registration form. As with the previous Notice article, we need to find the full element name of the Member Last Name and Member Email element used in the Member Registration form. Click Elements and filter for the Member Registration form. The full name of the Member Last Name element in our case is
afc_member_registration___member_last_name
The full name of the Member Email element is:
afc_member_registration___member_email
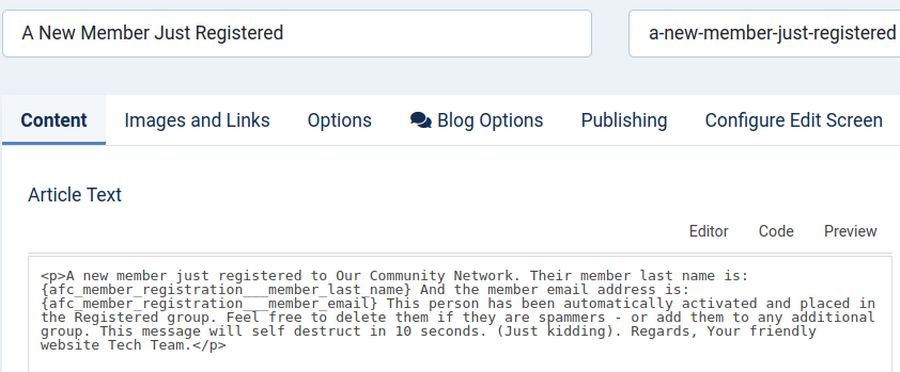
Next, create a Joomla with the Title: A New Member Just Registered. For text, in the JCE Editor, click on the CODE tab. Then copy paste:
A new member just registered to Our Community Network. Their member last name is: {afc_member_registration___member_last_name} And the member email address is: {afc_member_registration___member_email} This person has been automatically activated and placed in the Registered group. Feel free to delete them if they are spammers - or add them to any additional group. This message will self destruct in 10 seconds. (Just kidding). Regards, Your friendly website Tech Team.
Then click Save. Here is what the result will look like:
Note that we have used the element lastname as a Fabrik placeholder and placed curly brackets around each element. Placeholders will help the Member Coordinators link which Notice is associated with which new Member. Click Save and Close.
Add the Admin Notice Email Plugin
Go to Fabrik, Forms, Member Registration Edit and click the Plugins tab again. Then click Add and select the Email plugin. Change On from BOTH to NEW. For Email, type in the email addresses of one or two people who should be notified that a new member has been added.
Place a comma after each email address except the last:
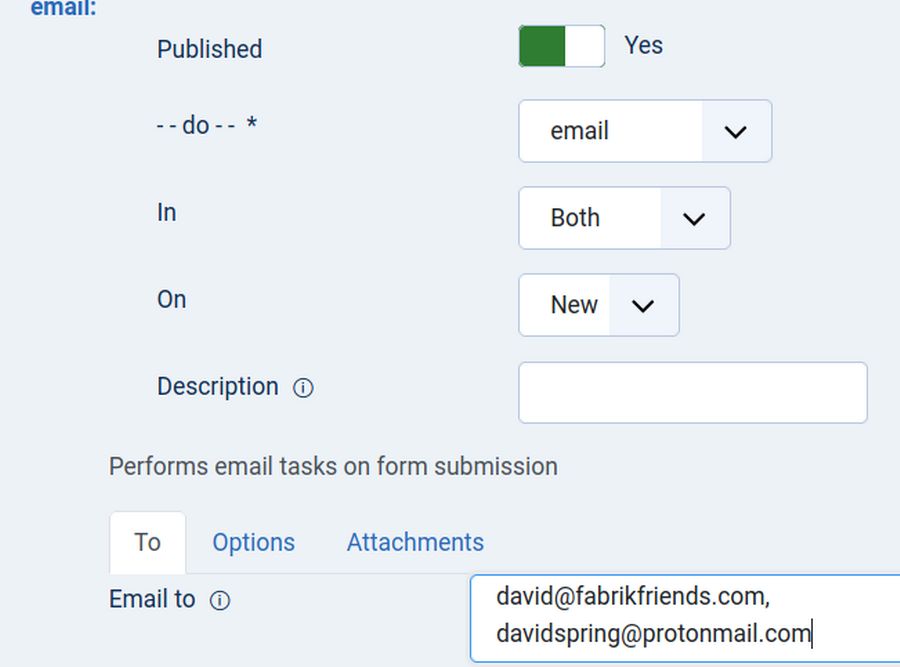
When a new Member submits a form and becomes a registered Member an email will now be sent to each of these people. Then click on the Options tab. In the From box and Reply box, use a custom email that is from your domain name. We will use the email
For the Subject box, type: A new Member has registered on Fabrik Friends. For the Article Template box, select the article A New Member Just Registered. Then click Save and Close.
Test the Sync Function
Before we add elements to the other two groups, we will do some testing to make sure the Sync Function works for our existing members. First, in Fabrik elements, filter for the Member Registration form and change Show in List so that only First Name, Last Name and Email show in the list. Then go to Fabrik Forms, Member Registration row and click Update database. Then click View Data. Do not be surprised if there is no records there yet. Click Add.
At the top of the page was this notice:
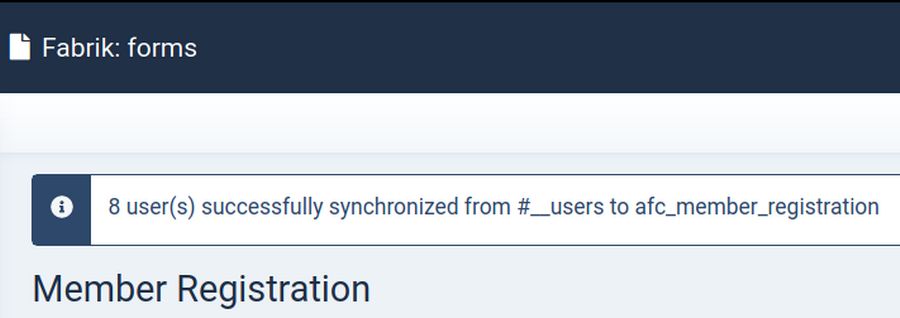
Then click on the back arrow to and you will see that only the Member Emails appear in the list. Click Edit to edit one of the members. Note that the User groups are shown correctly in the form. Then add a first and last name. Also if the username was changed to the email address, change it back to the correct username. Then click Save. Add first names and last names to all existing members.
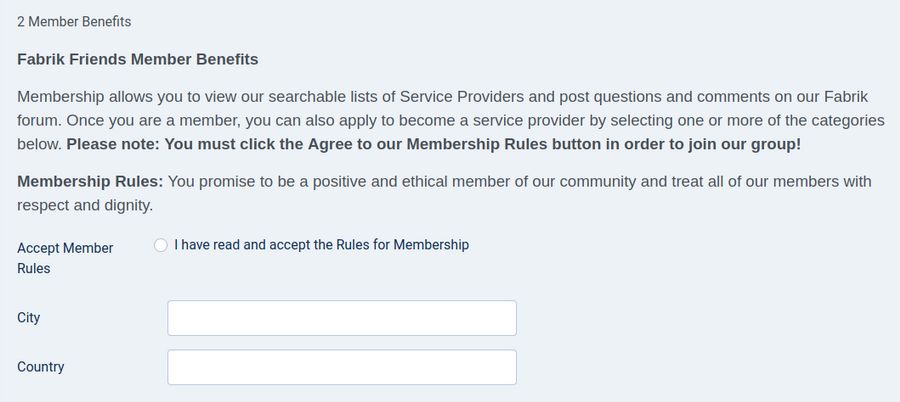
Add 3 Elements to the 2 Member Benefits group
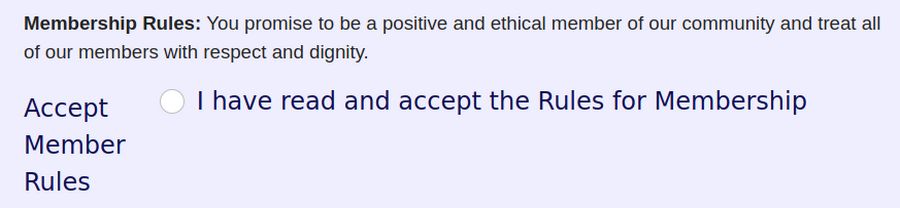
Go to the Member Registration form and click ADD to add another element. For the first element, for Label, copy paste: Accept Member Rules For Name, type: accept_rules. For plugin, select radio-button. For Group, select 2 Member Benefits.
For value, type: accept_rules. For Label, copy paste: I have read and accept the Rules for Membership

Then in the Options tab, change the class from col-sm-6 to col-sm-12. Change the Options per row from 4 to 1. Then click Save and New.
For the second element label, type: City. For name, type city. For plugin, select field. For group, select 2-member-benefits. Then click Save and New.
For the second element label, type: Country. For name, type country. For plugin, select field. For group, select 2-member-benefits. Then click Save and Close.
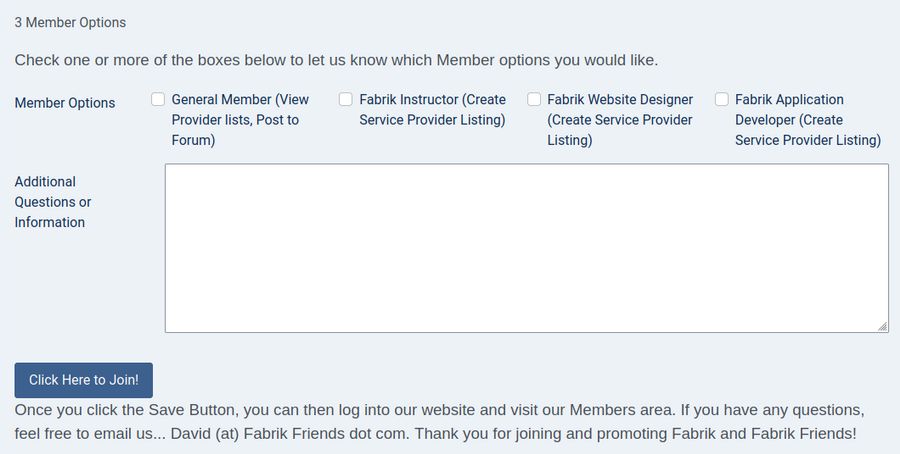
Add 2 Elements to Group 3 Member Options
Go to the Member Registration form and click ADD to add another element. For the first element Label, type Member Options. For Name, type: member_options. For plugin, select checkbox. For group, select 3-member-options. Then in the Options tab, click plus to create 4 options.
For values, type general_membership, instructor, website_designer and application_developer. For Labels, copy paste:
General Member (View Provider lists, Post to Forum)
Fabrik Instructor (Create Service Provider Listing)
Fabrik Website Designer (Create Service Provider Listing)
Fabrik Application Developer (Create Service Provider Listing)

Then in the Options tab, change the class from col-sm-6 to col-sm-12. Then click Save and New.
For the second element Label, type: Additional Questions or Information. For Name, type: questions For Plugin, select Text Area. For group, select 3 Member Options. Then click on the Layout tab and change the class from col-sm-6 to col-sm-12. Also increase the Height from 6 to 8. Then click Save and Close.
Add One Element to Group 4 Prove you are human
We will use a non-Google spam filter to reduce spam. Go to Components, Fabrik and click Forms. Click Add to add a new element. For Label, type Are You a Robot? For Name, type: prove_human. Then for Plugin, select captcha. For Group, select 4_prove_human. Then scroll down to the Options tab, Method and click Standard.
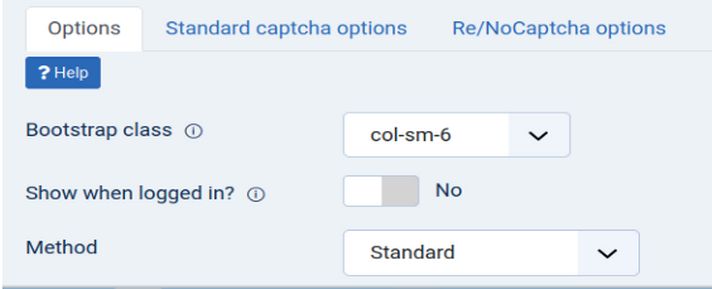
Click on the Standard captcha options tab. Increase the Font Size from 30 to 50. Increase the Text Padding from 10 to 15. Then click Save & Close.
Add Final Instructions to the bottom of the Registration Form
Open and edit the Registration form to add this to the Footer text at the bottom of the form: Once you click the Save Button, you can then log into our website and visit our Members area. If you have any questions, feel free to email us... David (at) Fabrik Friends dot com. Thank you for joining and promoting Fabrik and Fabrik Friends!
Then click Save and Close.
Add Validation to Required Elements
This includes First Name, Last Name, Username, Email, Password, City, Country.
Create a Menu Item to view your Member Registration form
Go to the Main Menu and click New. Then click Select and select Fabrik Form. Then select the Member Registration form. For Title, type Member Signup. Then in the lower right corner, change the Access from Public to Guest. This will hide the Signup menu item from Members who are already logged in. Then visit the Member Registration form in the front end of your website.
Customize the Appearance of your Member Registration Form
We can use some simple CSS rules to customize the appearance of our Member Registration form. Here are a couple of examples. We will first make the Accept Rules Element text big and bold. We will then hide the Remember Me Text on the Joomla Login Form.
Make Accept Rules Element Text Big and Bold.
Here is the CSS Selector Class as determined by the Firefox inspector:
fb_el_afc_member_registration___accept_rules
Note that each element on each form has its own CSS Class. The class is divided into three parts:
fb_el_ stands for Fabrik element
afc_member_registration is the name of the form and table.
_accept_rules is the name of the element.
Here is an example:
fb_el_table_name_element_name
Here is my CSS: Add a dot at the beginning of the CSS class selector. Then add curly brackets around the CSS rules.
.fb_el_afc_member_registration___accept_rules {
font-size: 24px; font-weight: bold; color:#111155;}
Then place this in the Helix Custom Code CSS box. Click Save and Close and view the Registration form again.
Hide the Joomla Log In Form Remember Me Text
The log in form has a check mark box called Remember Me. This places the user name and password into a memory area that might allow hackers to compromise member usernames and password. We can hide this box by adding the following CSS to the Helix Custom Code CSS box:
#form-login-remember {display: none;}
Test your Registration Form
Add a test user with a real email address to make sure the form is working properly.
View the Member Registration form in the Fabric Form screen
To see this form in the back end, click Forms, Registration View Data. Then click Add. Here is the top:

In the back end, the Member User groups can be selected in this section. The User groups selectors do not show on the Front End Member Registration form.
Here is the middle of the form:
Here is the bottom section of our Member Registration form:
The captcha spam filter is not shown on the back end version of the Registration form. But it is shown on the front end version.
Congratulations! You’re done building your custom Registration Form!
What’s Next?
In the next article, we will create our Service Provider forms.