
The purpose of creating a custom access control system is to allow different members of our network to access different parts of our website. Fabrik comes with special functions to work directly with Joomla groups and access levels. Together, they make the ideal combination for creation of a community network.
To demonstrate how Joomla and Fabrik work together to build and support a community network, in this article, we will create a Demo Community Network.
#1 Define our Demo Community Network Members
A typical community network consists of at least three groups:
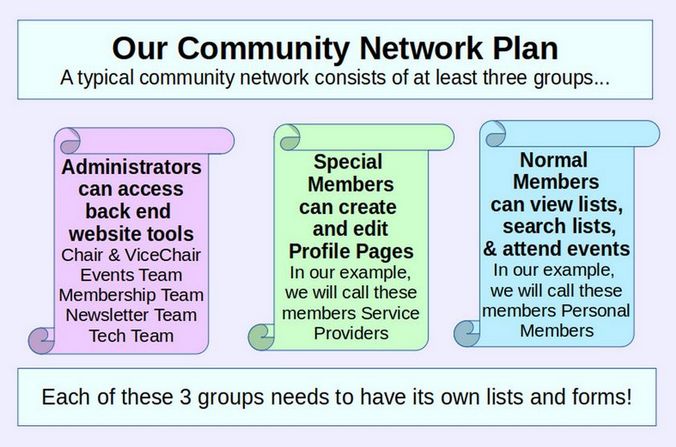
For security reasons, only a small group of people should have access to the back end of the website – and even then, they should only have access to the specific tools in the back end that they need to administer the website. We will cover these administration tools, such as the newsletter component and the Downloads component, in a later chapter. These administrators will typically not be managed by Fabrik forms. Instead, they will be added directly as Joomla administrators using the Joomla Administrator Control Panel User Manager.
The remaining two groups are normal members and special members. Normal members are often given a free membership and merely register in order to get access to the Member Lists, and Search Functions and receive the Members Newsletter and attend Member Events. Normal members can see the Lists and Search Functions and Coming events merely by logging into the website.
Special Members register with the same Member Registration form as Normal Members. However, they are allowed to create custom Member Profile Pages which are then shown on a special searchable list which can be viewed by all members. In our example, we will call these special members Service Providers – because they offer services to other members of the group (who in turn are interested in hiring some of the service providers). However, if this were an educational network, the Special Members might be teachers offering courses to the community and the normal members might be parents and teachers interested in taking those courses.
The important point is that both Special Members and Normal Members join the group by filling out the same Fabrik custom Member Registration form. Both Special Members access their group functions by logging into the front end of the website. But they see different menu items when they log into the front end of the website. Neither Special Members or Normal Members ever need to log into the back end of the website.
Administrators added via the Joomla Back End User Manager
Those with access to the back end of the website should get at least some training in website security. In particular, they should only use a Linux computer to log into the back end of the website and never use a Windows or Apple computer – as using these insecure computers might allow hackers to access the back end of our website. It is also best to have more than one person able to perform the same task in the back end – in case a task needs to be done right away. This is why each of the following positions should be regarded as the leader of a team rather than the sole person responsible for carrying out the needed tasks.
Our Demo community network will be led by a five member Board of Directors which will meet once a month and be subject to election by our community network members every two years. The Board will have the following positions:
Chair
Vice Chair who is also the Events Coordinator
Membership Coordinator
Newsletter Coordinator
Tech Team Coordinator
Here is a brief summary of the roles of these five positions and how the areas of the website each position needs access to.
Chair and Vice Chair… Because the chair and vice chair who is also the Events Coordinator, will be in charge of the meetings and approve all events, they need access to the Events section of the website.
Events Coordinator… With the approval of the Chair, the Events Coordinator will plan all events, including membership meetings and outreach events. This person will also post all events on the website community calendar and provide a list of all coming events to the Newsletter Coordinator. The Events Coordinator will also lead the Events Committee which can propose, coordinate and carry out community events. The Chair will also serve on the Events Committee.
Membership Coordinator… The Membership Coordinator will be responsible for approving and organizing all memberships, services providers and supporters. The Membership Coordinator can lead a Membership Committee which will assist the Membership Coordinator and be present at monthly meetings to enroll new members. The Membership Coordinator will need access to the Member Database section of the website.
Newsletter Coordinator… The Newsletter Coordinator will be responsible for writing all newsletters including a summary of coming events provided by the Events Coordinator. The Newsletter Coordinator will also be responsible for sending all newsletters to the members and updating the list of subscribers using the members list provided by the Membership Coordinator . The Newsletter Coordinator will lead the Newsletter Committee and will need access to the Newsletter section of the website. The Newsletter Coordinator will also be responsible for coordinating the written information provided to community members at weekly meetings. They will also be responsible for organizing and posting informational documents for Download on our website. The Newsletter Coordinator will therefore need access to the Downloads section of our website.
Tech Team Coordinator… The Tech Team Coordinator will be responsible for building and running the community network website. This will include the Membership Registration System, the Newsletter system, the Document Download System, the Events Calendar system and the Services Providers Information System. The Tech Team Coordinator will also lead the Tech Team which will train group members on how to run various sections of the community network website. The Tech Team members will need access to all areas of the website.
Service Providers… Service Providers are members of our community network who want to promote their business, skills or other services to the members of our network. They can pay at either a monthly meeting or by mailing a check to the Community Network Post Office Box or by paying online through the website store.
We will have three categories of Demo Service Providers. We will call these categories carpenters, plumbers and teachers. We will also have three cities which we will call Bellingham, Ferndale and Lynden. With one person in each category and each location, there will be a total of 9 Services Providers.
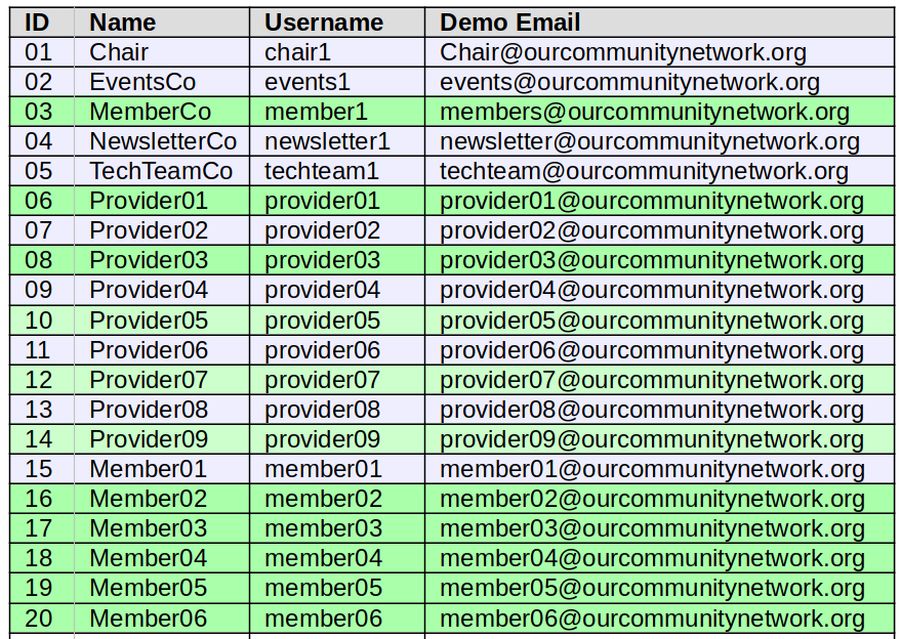
Table of Our Demo Network Members
This table provides a summary of all members in our community network including the 5 board members, 9 Service Providers,and 6 General Members. Thus, our initial Demo Network will consist of 20 members. To register on our website, each of these people will need a Name, a Username, a Password and an Email Address. While we could use dummy email addresses such as Chair1 at example dot com, it is better to use actual email addresses, all associated with our community network domain name so we can see how the actual process works. In a moment, we will explain how to create Demo Domain Related Email addresses. For now, we will use the example
Here is a our table of our 20 members:
Note 1: Hestia passwords must have at least 8 characters and at least 1 upper and lower case letter, at least 1 digit and at least 1 non-alphanumeric character such as *. Create your own passwords. These passwords can and should be changed by the actual user.
Create Demo Domain Related Email addresses
Before we create these accounts in our website database, we need to first set up their domain related email addresses. To do this, log into your Hestia Admin panel and go to the User panel. Then click Mail.
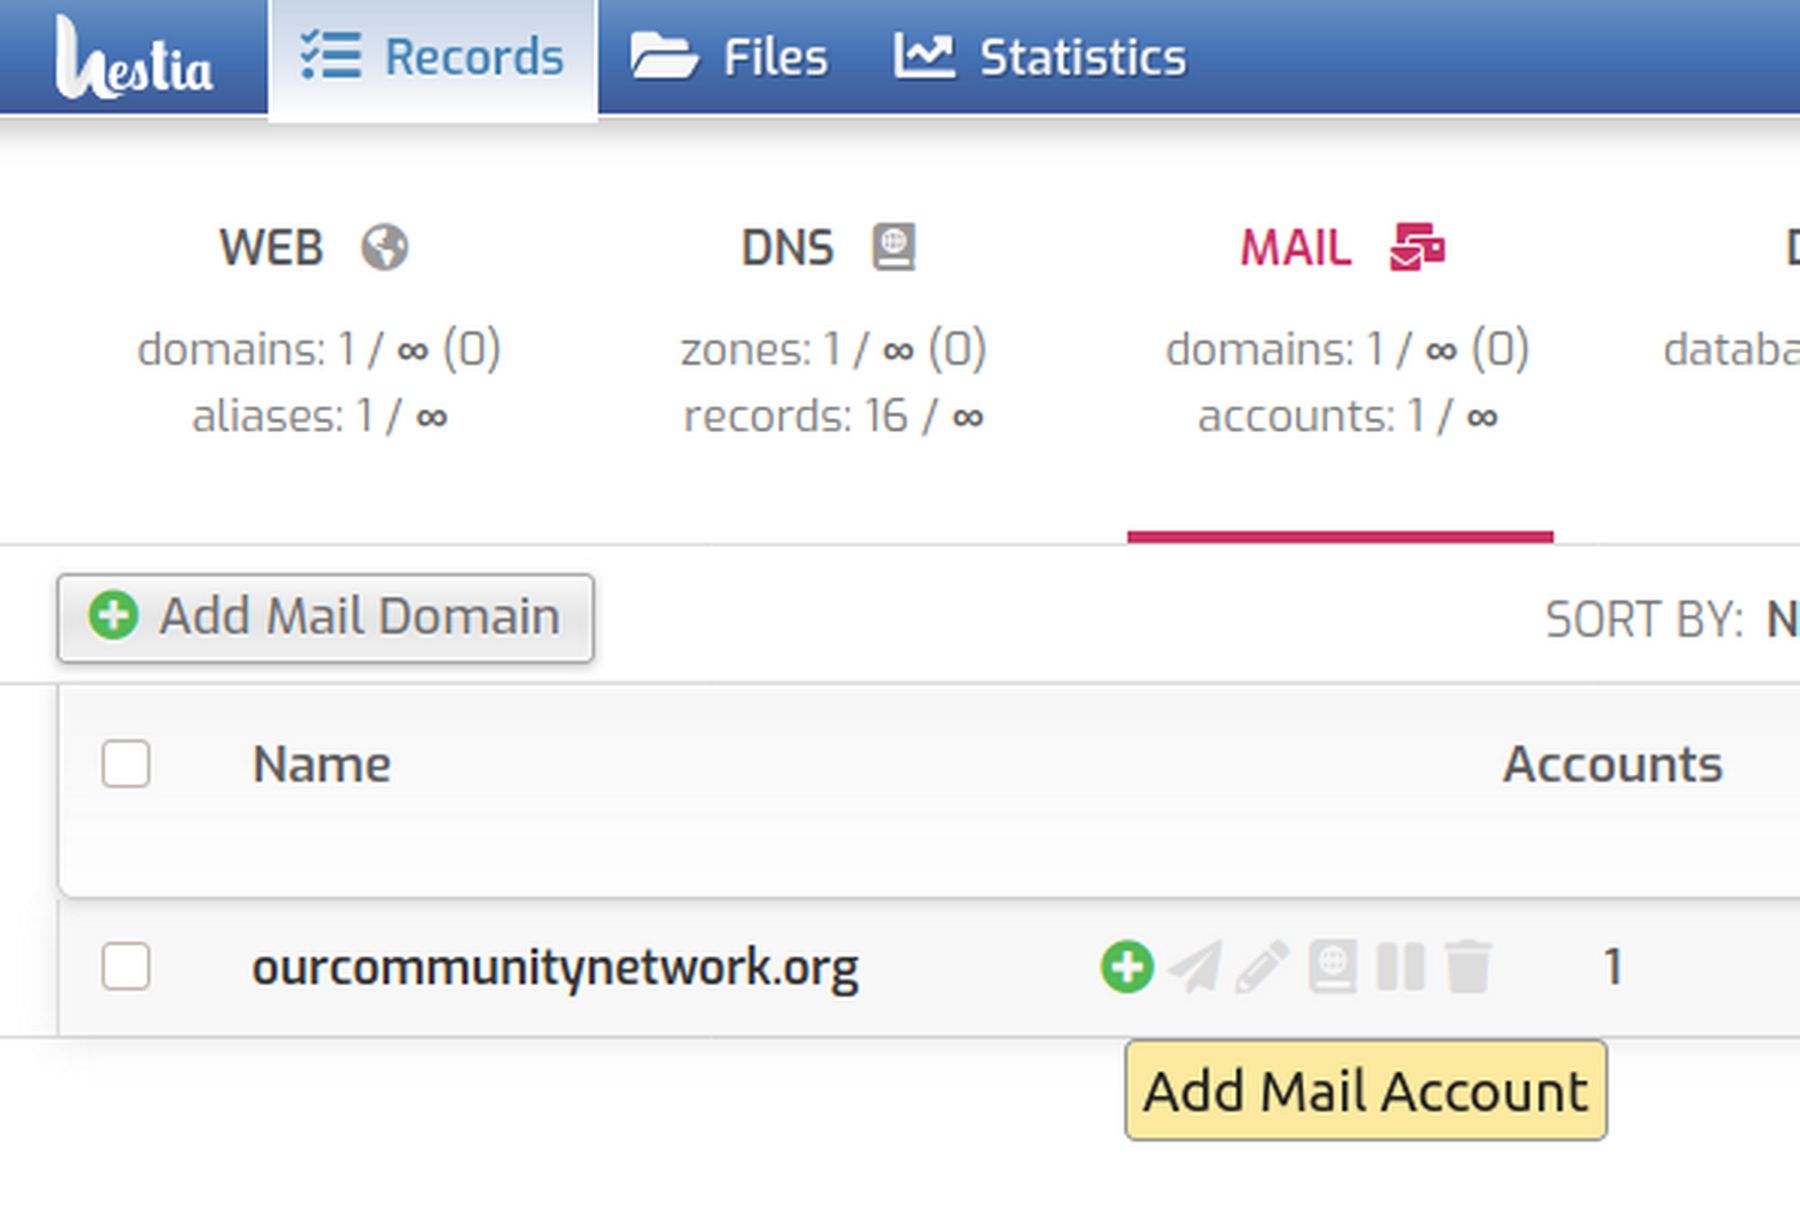
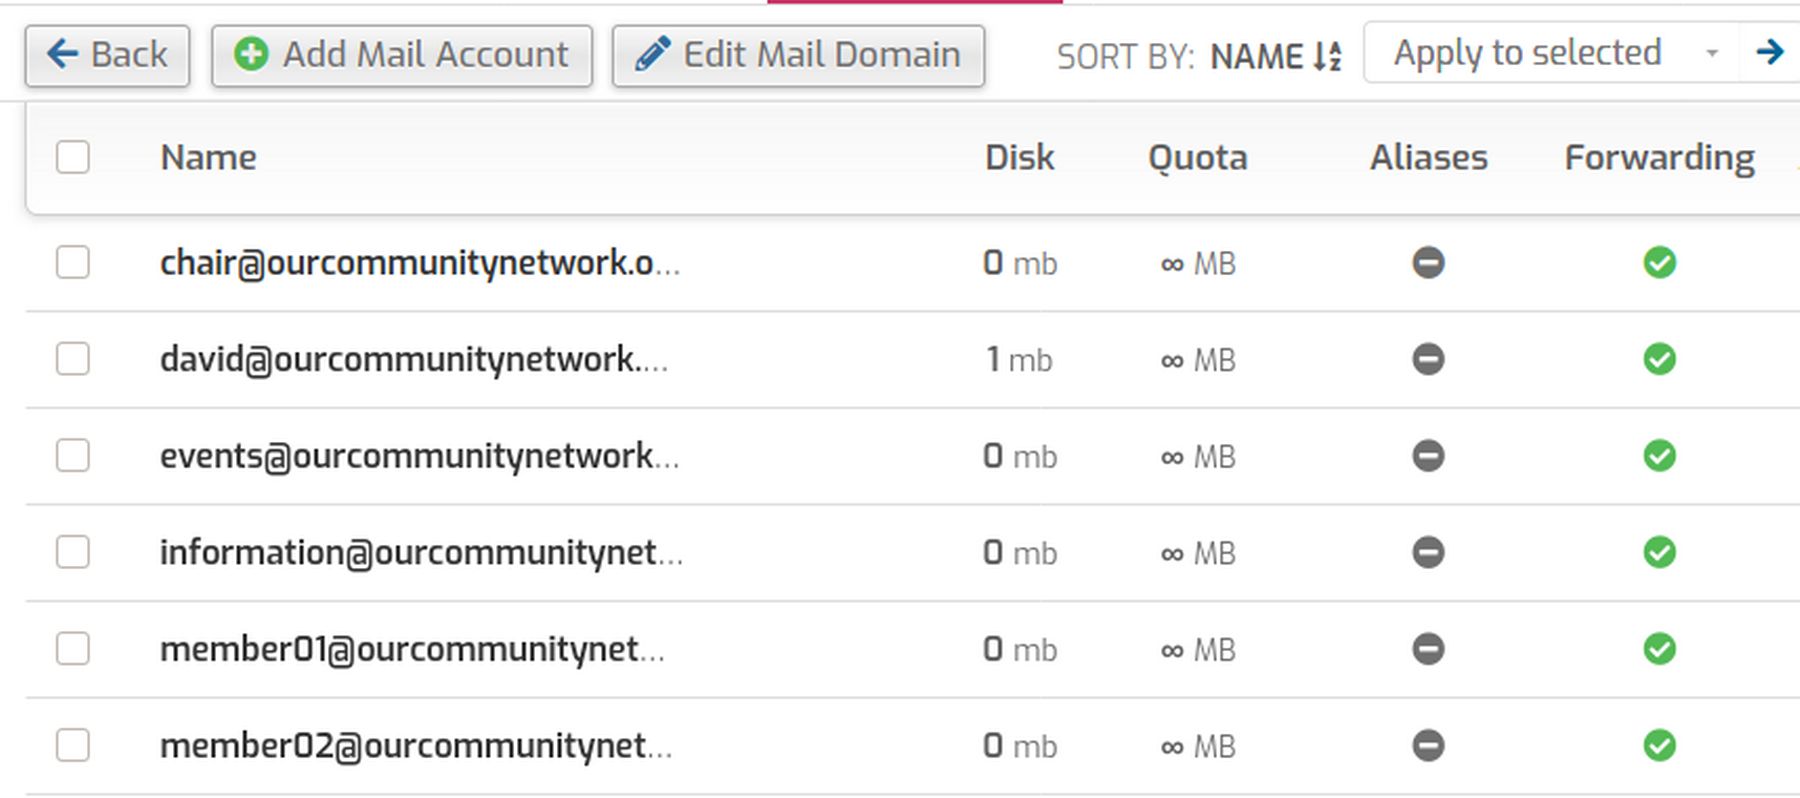
Our Community Network dot org currently has one email address account. Click on the plus sign to create another one:
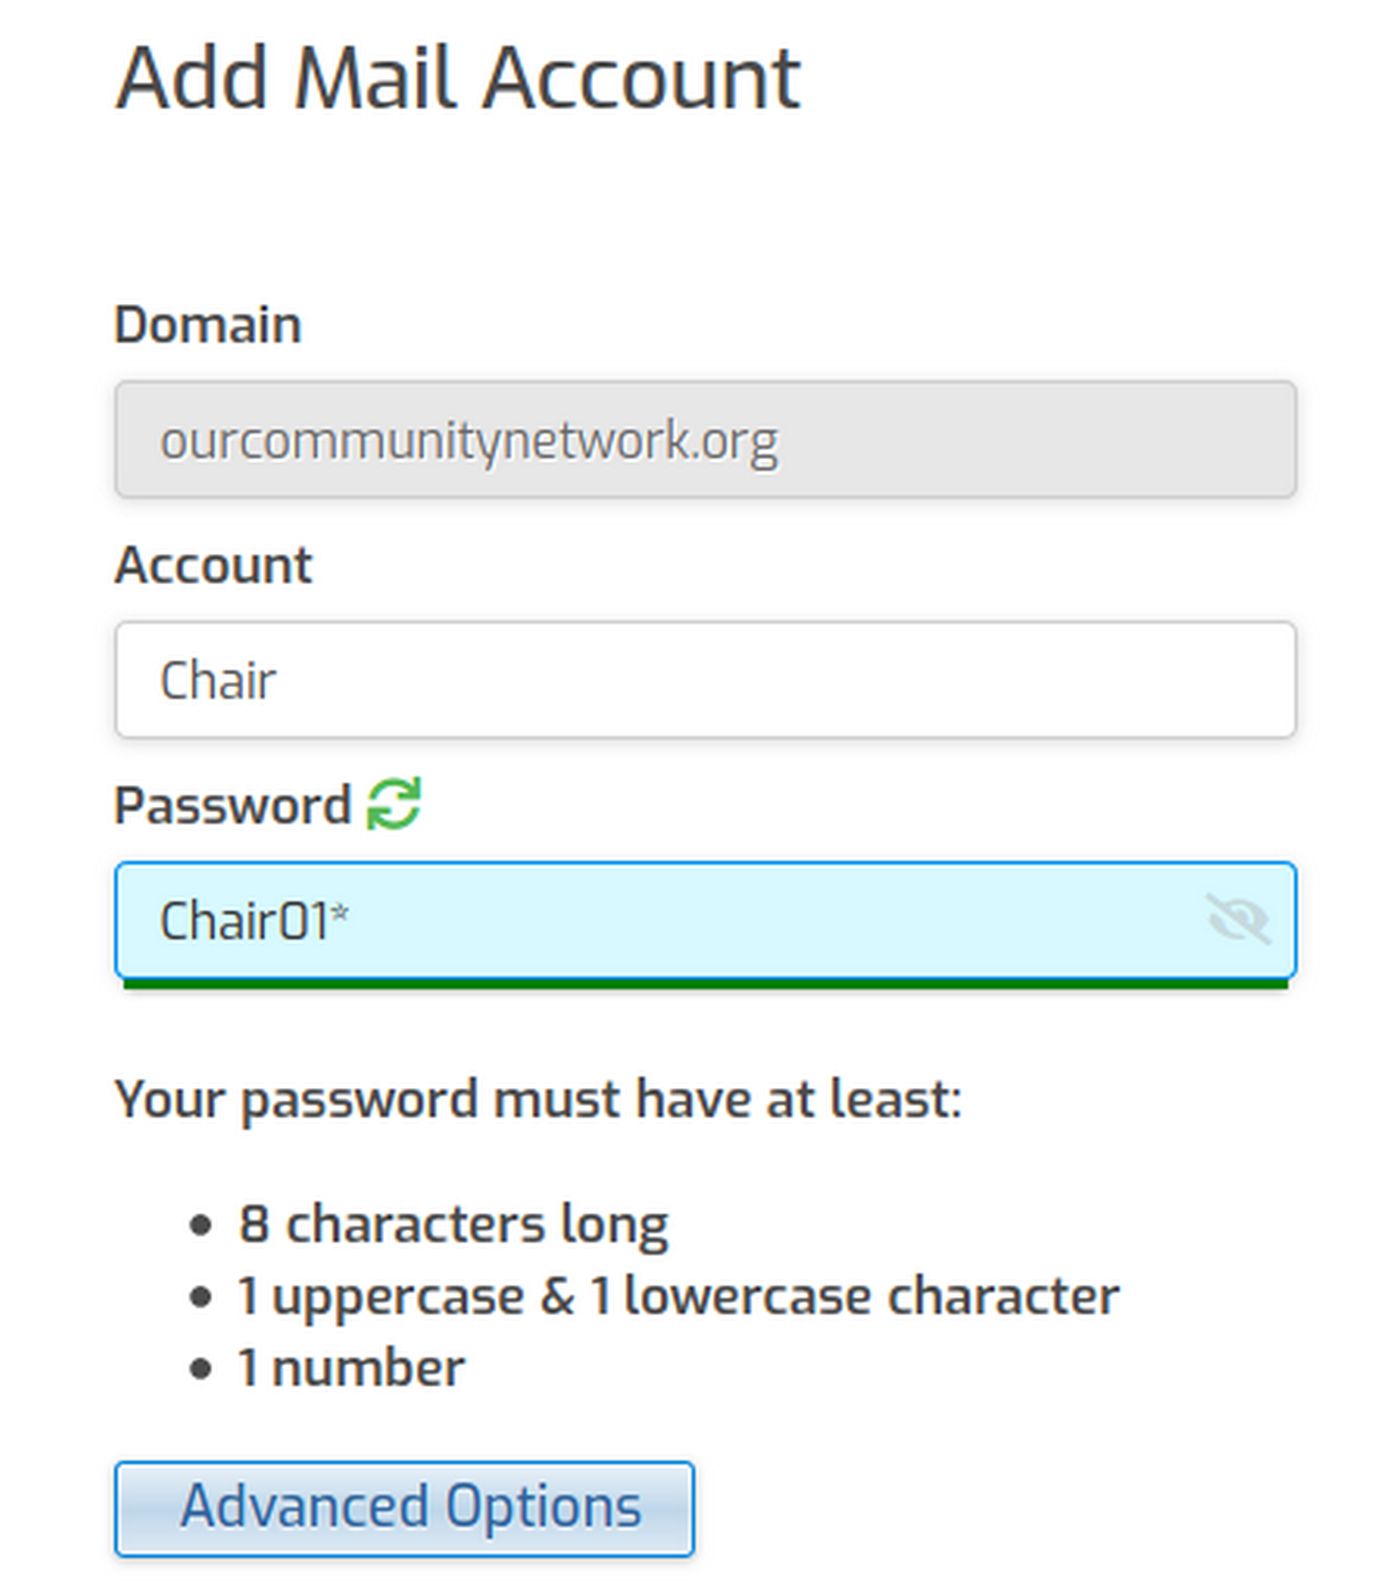
In the Account box, type Chair.
Then use the password from the table above. Then click Save and Back. Then click on the Edit pencil to edit the account. In the Forward To box, type in your normal email address so that all mail sent to this user is forwarded to you. Then click Save and Back. Then click Add Mail Account. Repeat this process until all 24 email accounts are created.
Then in the upper right corner, click on the arrow to go back to the admin panel. Then click on it again to log out.
Service Provider Additional Information
For Service Providers to be searchable, we also need to include their Service Provider Category as well as their City. We will have three members that only have one category and three members that have two categories. Here is a table of this information:

For all, type in a Demo description (such as This is the Demo description for Provider01)
Use the Joomla Control Panel User screen to create accounts for our 5 board members.
Log into your Joomla control panel and click Users:
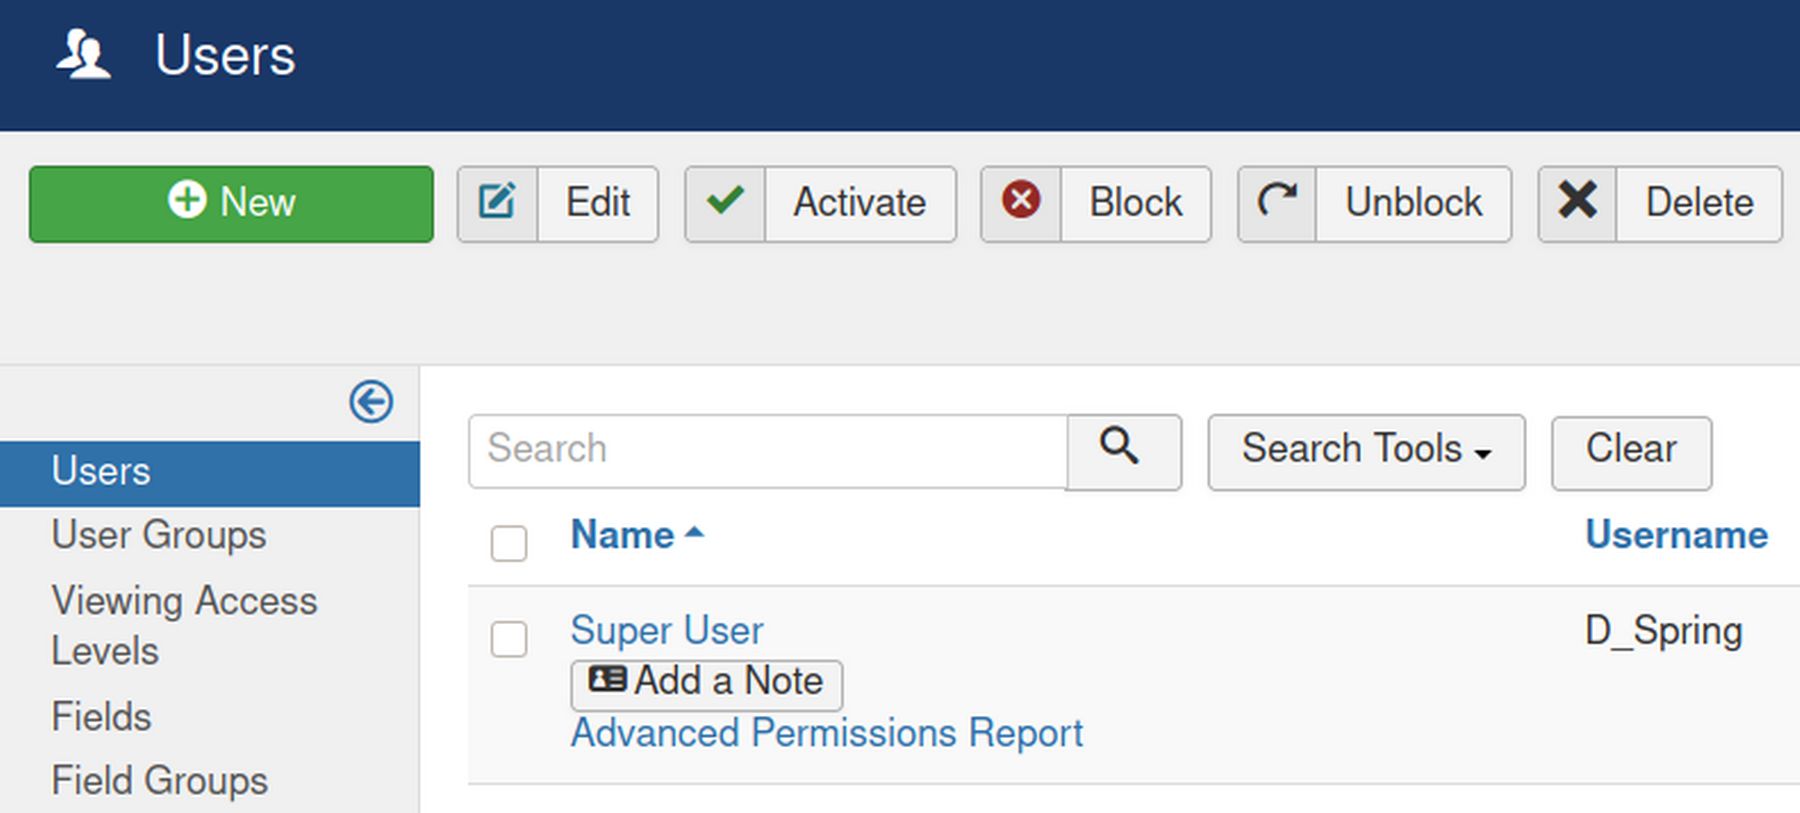
Click New.
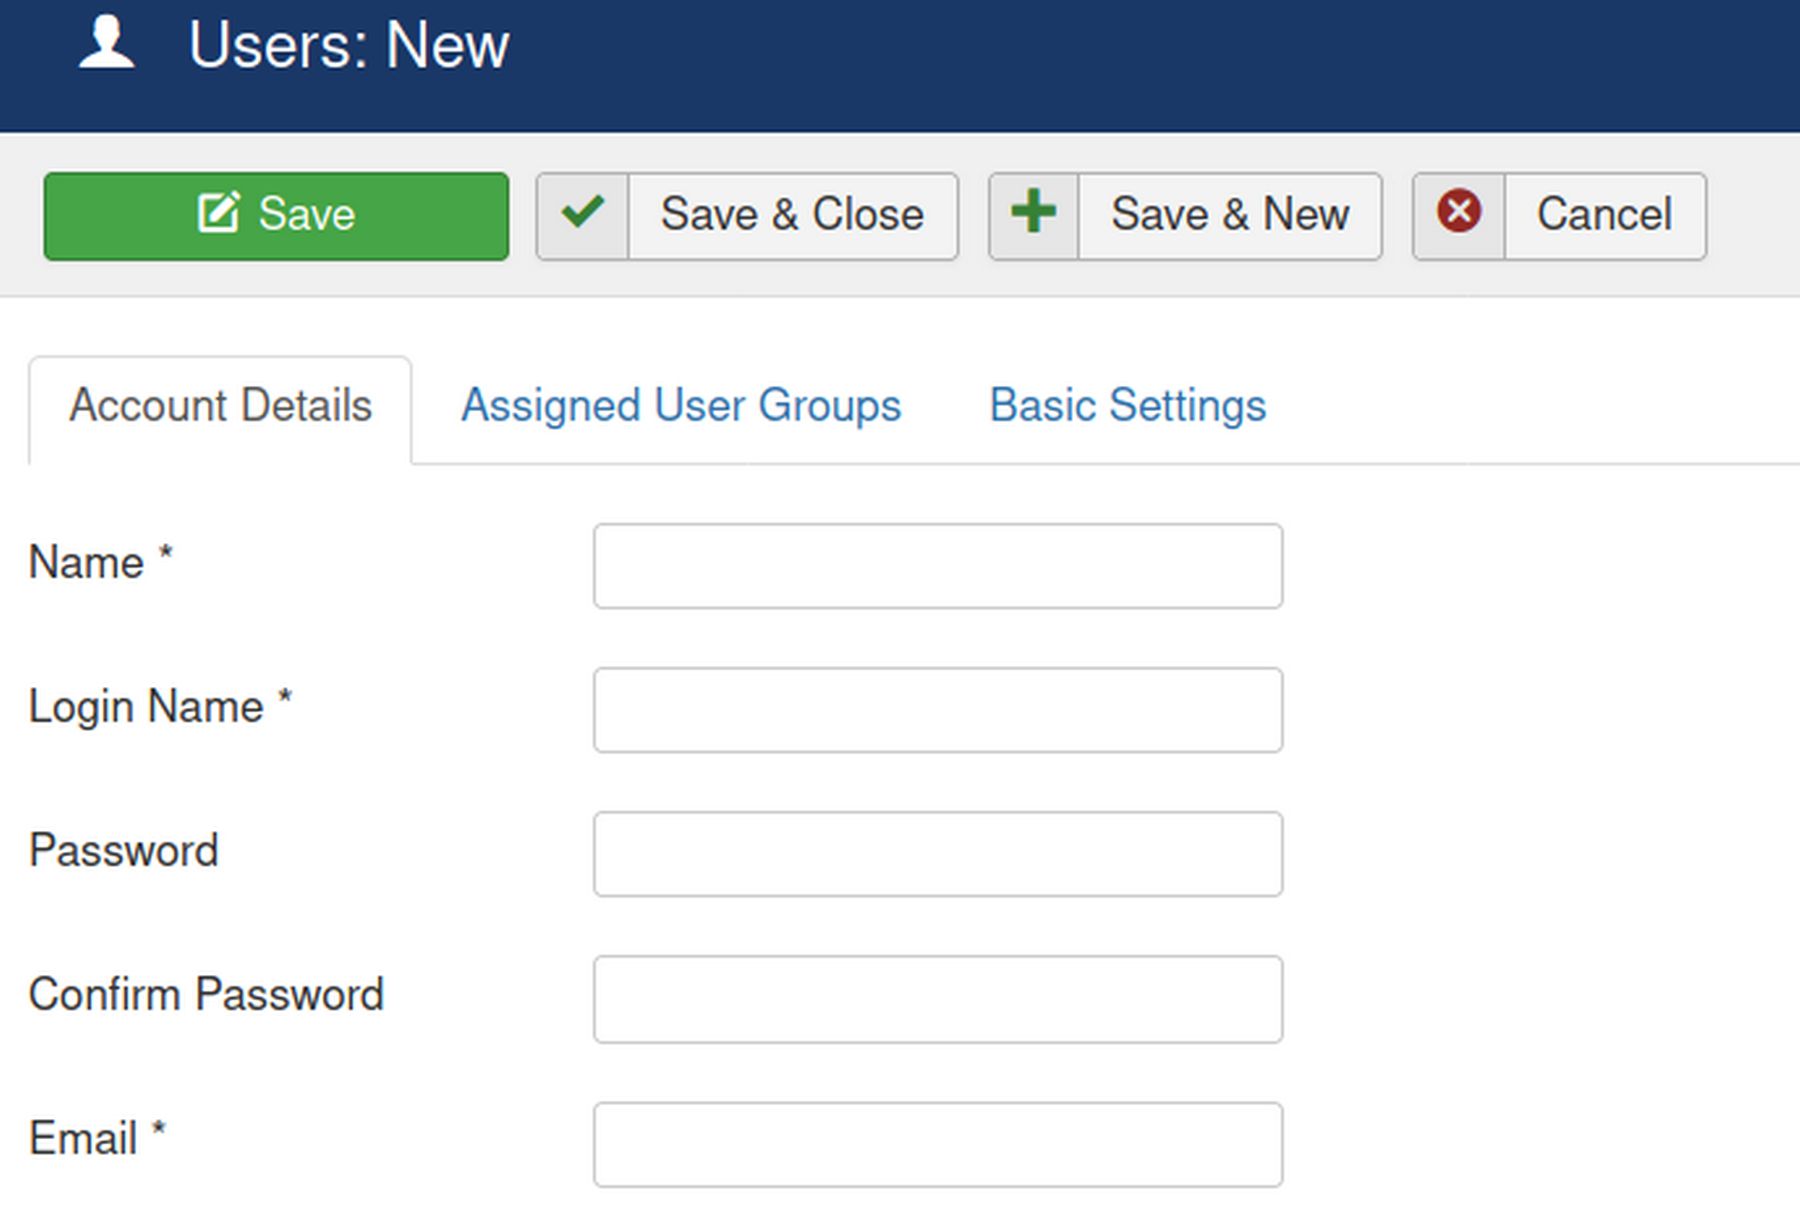
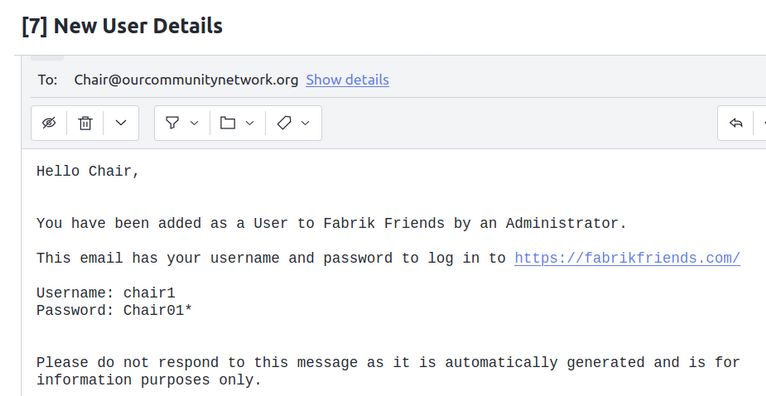
Type in the Name, Username, Password and Email address of the Chair and then click Save and New. Repeat for the other six Board members. Each new member will receive an email letting them know that they are now a registered member of our network:
Here is our list of Joomla Users:

Note that all of these Demo Members have been automatically assigned to a Joomla User Group called Registered. The Registered User Group is allowed to log into the front end of the website and see any menu items that have been assigned to the Registered group. But the Registered Group is not allowed to log into the back end of the website (aka the Joomla Control Panel). Currently, the only one who can log into the Joomla Control Panel is the person who created the website. This person is automatically assigned to a Joomla Group called Super Users.
Look at the List of Default Joomla User Groups
Click on Users, User Groups in the Top Menu. Or click directly on User Groups in the side menu. Either way, you get to the Users Groups screen.
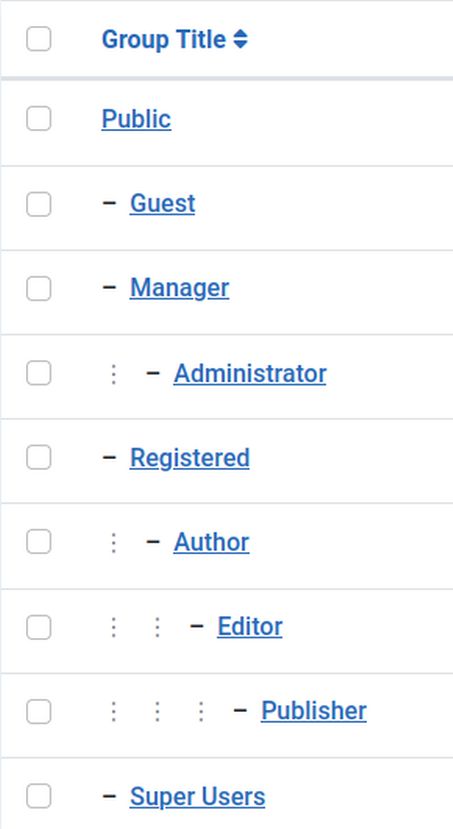
By default, there are 9 Joomla User groups. Before we add a custom User Group, let’s look at what each of these existing groups can do.
Joomla User Groups
Joomla uses groups as a method for assigning different sets of permissions to different group members to view different pages and do different tasks on those pages . Put another way, a group is a collection of users who all share the same set of permissions. As a super user, you can assign any member of your organization to any number of User Groups.
Groups control what you can see and what you can do
The Joomla User Management system is actually two separate systems. One an Access system controls what website pages group members can see. The other is a Permissions system that controls what actions group members can do.
Back End versus Front End Groups
In addition to viewing certain pages and taking certain actions, access control for viewing and doing can be divided into the front end viewing and doing versus back end viewing and doing.
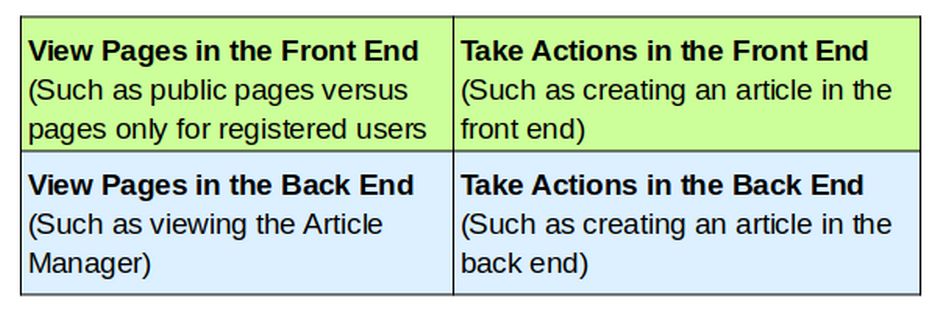
Some people think of access control as simply limiting what pages a person can see on the front end of a website. The public sees only some of the pages. Registered Users see more pages in the front end. The Super User sees all the pages in the front end and back end of our site. But what a person can do matters just as much as what they can see. Joomla has one set of groups for the Back End and another set for the front end:
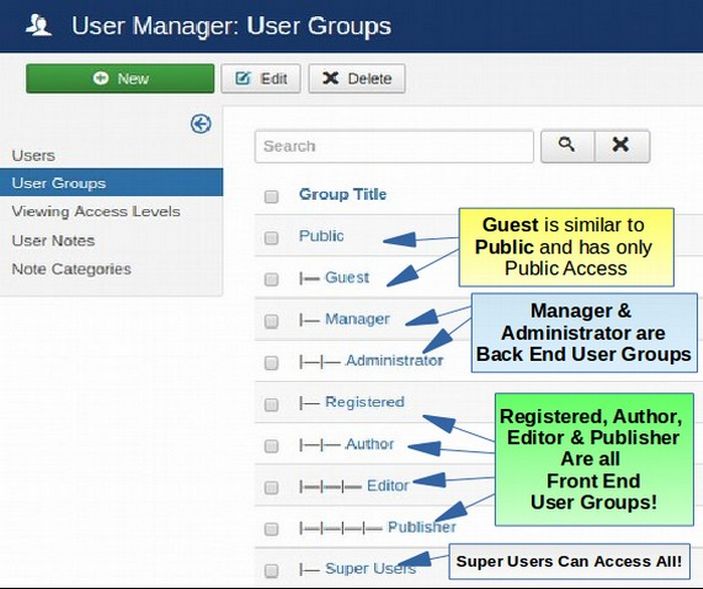
Note that Manager and Administrator are back end user groups while Registered Author, Editor, and Published are Front End User Groups.
Back End User Groups
These two groups are followed by two groups, called Manager and Administrator with (limited) access to parts of the back end of our website. Back end groups can log into the back end of our website via the sitename/administrator URL for our website.
Managers can create, edit, publish and delete all articles on the back end of our site. This makes them similar to the Publisher (Front End) Group. Managers also have access to the Media Manager and Contacts components in the back end of our website.
Administrators can do everything managers can plus they can create new users, manage group privileges and install extensions. They have access to nearly every part of our website except Global Configurations and the Template Custom Edit screen. The only group that can do more than Administrators is the Super User group.
Four Front End User Groups
The remaining four user groups all only have access to the front end of our website.
Registered Users can view menu items and articles that are set for Registered User access – but only after they have logged in. Registered means pages that can be viewed by anyone who has filled out the Registration form for our website – and therefore become a member of our community network. Members of this group need to log in to our website after registering in order to see pages on the website intended only for Registered members. All one needs to become a Registered Member is to fill out the registration form with a unique email address and then be approved by an administrator.
Authors have all the permissions of Registered Users. Plus they can create new articles and edit the articles they have written (after they have logged in to the front end of the website). Authors and all other groups except Public and Registered are assigned by the Super User of the website.
Editors have all the permissions of Authors. Plus they can edit all articles written by anyone – even unpublished articles.
Publishers have all the permissions of editors. Plus they can publish articles. However, they cannot create menu items. So unless an article has been assigned to a category, it will not be viewable even after it is published – until a super user creates a menu item for it.
Super Users can create menu items and control any part of the website including adding or deleting any other Super User! The first super user was created when our Joomla website was created. The first super user is considered the Site Owner.
Parent and Child Groups
Note that there is only one group which does not have a dash in front of its name. This group is called Public. Public is the group with the least amount of Permissions. By default, any menu item or article we create can be viewed by the public. Groups with a single dash to the left of their name are called a “child” of the Public group. The four groups with a single dash are called Guest, Manager, Registered and Super User. These groups can see and do everything the Public group can do. Plus they can see and do more. Children can always do more than their parents.
What’s Next?
In the next article, we will assign some users to different default user groups and create a new user group called Service Providers which we will use to give special permissions to our Service Provider special members. After we create our custom Fabrik Registration form, we will use our Custom Registration form to create accounts for the other 15 members of our Demo Network. We can then see how the Fabrik Search Function works.